
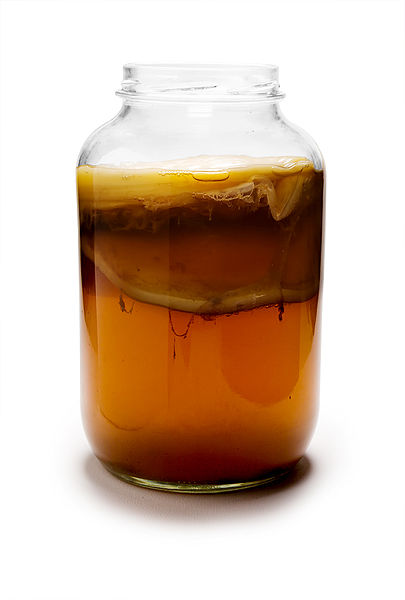
Kombucha with SCOBY. Photo credit: thedabblist (64636759@N07/Flickr)
Craving some kombucha without the grocery store prices? Why not try brewing your own kombucha? As a fermented tea drink that is brightly effervescent, deliciously tangy, and slightly sweet, having some kombucha on hand could add a little spring to these cold seasons. On top of that, the brewing and fermentation involved in kombucha-making requires a little scientific know-how and quite a bit of trial and error to perfect the flavor to your liking. Think of it as having a science experiment in your kitchen!
At first glance, making kombucha appears fairly simple, as there are only four basic ingredients that go into it: water, tea, sugar, and a “Symbiotic Colony of Bacteria and Yeast,” SCOBY. If a flavored kombucha is desired, specific flavor ingredients can be added too. A cursory investigation into each ingredient, however, may bring up some questions. What type of tea makes the best-tasting kombucha? What is SCOBY and where can you source it? Is it possible to brew a sugar-free kombucha? Here is your scientific guide to making kombucha. We provide some scientific information regarding each component to help make an informed decision in choosing the ingredients that would create the kombucha that best aligns with your preferences.
SCOBY
What is it?
SCOBY is the most important component of kombucha, since it is the only thing standing between ordinary, sweetened tea and kombucha. Other fermented foods which utilize a similar symbiotic culture include kefir, ginger beer, vinegar, and sourdough. SCOBY is a grayish-white or beige, squishy mass floating within the brewed culture, and it is responsible for the distinct vinegar-like flavor, trivial alcohol content, and characteristic carbonation of kombucha. However, to call this leathery, stringy mat a symbiotic colony of microbes is a scientific misnomer. Biologically, a colony implies a coexisting group of individuals within the same species; a microbial colony is a cluster of microorganisms which have descended from a single cell, a common ancestor. SCOBY, on the other hand, is a symbiosis of multiple bacterial and yeast species cohabiting a cellulose matrix [1]. It may be more accurate to describe SCOBY as a biofilm, a colony of several microbial species attached to one another on a surface.
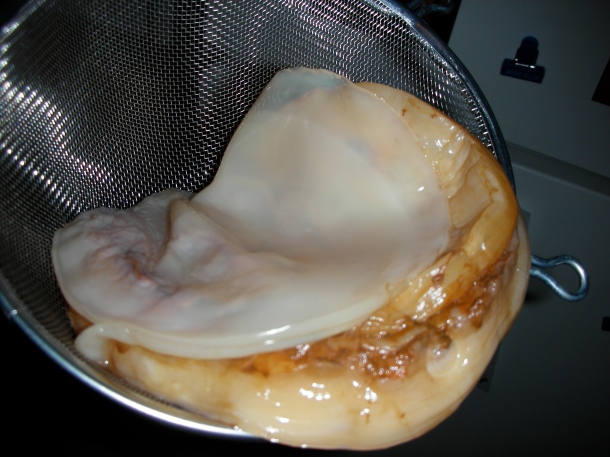
A symbiotic culture of bacteria and yeasts. Photo credit: Robert Anthony Provost (twon/Flickr)
As the name implies, SCOBY is alive. A study on the microbial populations existing in SCOBY reveals that the bacterial genus Gluconacetobacter is the most abundant [1]. Gluconacetobacter is responsible for the biosynthesis of the cellulose matrix that the SCOBY microbial population resides within. In other words, this genus of bacteria enables easy handling by creating the solid, stringy, floating mass that SCOBY is visually famous for. The next most abundant SCOBY bacteria belong to the genera Acetobacter and Lactobacillus [1], both of which give kombucha its acidic, vinegary taste by oxidizing ethanol to acetic acid and sugar to lactic acid, respectively. The yeast population of SCOBY primarily consists of the genus Zygosaccharomyces [1], which is notable for its high sugar, high alcohol, and high acid tolerance [2]. Yeasts in SCOBY generate CO2 and thus provide carbonation; they also produce alcohol, some of which is metabolized by Acetobacter into acetic acid. It is worth noting that the microbial composition of SCOBY may vary over time [1], possibly due to rapid growth, contamination, and/or random mutations. This compositional change may lead to flavor differences among different batches that have used the same SCOBY.
Where do I get it?
Home-brewing stores and online marketplaces are the more common places to buy SCOBY. For the more ambitious, there is also the option to culture SCOBY at home. Given that it is a collection of living organisms, you need to start with some pre-existing collection of kombucha microbes.
To make SCOBY at home, a modest amount of store-bought or homemade, unflavored and unpasteurized kombucha is required. Kombucha often contains a small amount of SCOBY left behind from the brewing process. To begin, place about 1 cup of kombucha with 7 cups sweet tea in a covered container and store for 1 to 4 weeks. In storage, the SCOBY microbes multiply and aggregate, with Gluconacetobacter synthesizing the cellulose that enables the microorganisms to grow together in that signature rubbery mass. For more detailed instructions, check out The Kitchn’s recipe for home-grown SCOBY.
Teas
Which tea?
Kombucha would not be kombucha without tea, but with so many varieties and forms to choose from, it’s easy to get lost. In general, teas are categorized by how the tea leaves (from the plant, Camellia sinensis) were processed, which affects the flavor, caffeine content, and color of the brewed liquid. Varieties among the basic tea categories arise from the geography of C. sinensis, growing conditions, time of harvest, and production processing, giving rise to notable flavor differences. The type of tea chosen will influence the prominent flavor profile of the finished kombucha. For the adventurous, different teas can be mixed together to create a unique kombucha flavor base.

Left to right: green tea, yellow tea, oolong tea, and black tea. Photo credit: Haneburger (Wikimedia Commons)
- Black: The most common choice for brewing kombucha, black teas undergo full enzymatic oxidation during production, which gives the drink a dark brown color [3]. Furthermore, complete oxidation of the tea leaves gives black teas a deep malt, caramel, or toasty flavor. This rich tea flavor enables a quick brew without flavor loss during kombucha fermentation.
- Oolong: Literally translating to “black dragon tea”, oolong teas are partially oxidized, ranging from 8-85% oxidation depending on the tea producer. Oolong flavor profiles fall between the robustness of black teas and the delicacy of green teas, with tones ranging from smoky and buttery to floral and fruity, depending on the amount of oxidation the tea leaves were processed.
- Green: During production, the oxidation process is stopped early; the tea leaves undergo minimal oxidation, giving green tea a more grassy, floral flavor when compared to other types of teas [3]. Due to their light and subtle flavors, green teas may have to be steeped many times for full flavor, and kombucha with a green tea base may have to be brewed longer.
- White: Unlike the other teas, white teas are made using only the buds of the C. sinensis plant. Additionally, some white tea varieties use buds that have been steamed or baked, which inactivates enzymatic oxidation. The minimal or absence of oxidation gives white teas a very delicate and subtle grassy flavor, and so this tea may have to be steeped multiple times and a kombucha with a white tea base may have to be brewed for a long time.
- Pu-erh: Pu-erh stands apart from other teas that use sinensis leaves by an additional fermentation step after the leaves are dried. Fermenting the tea leaves gives pu-erh teas a complex, sweet, earthy flavor profile that the other teas do not have [3].
- Herbal: Unlike the above four categories, herbal teas rely on steeping plant parts that do not come from sinensis. Herbal teas are strongly advised against for kombucha brewing, as the plants that are used often contain volatile oils that have anti-microbial and/or anti-fungal activity. Some common anti-microbial volatile oils found in herbal teas include lavender oil (from lavender teas), peppermint oil (peppermint teas), and eugenol oil (chai teas) [4], all of which can destroy the bacteria and yeast in SCOBY. A damaged SCOBY will not be able to ferment or carbonate the kombucha batch.
Loose leaf or tea bags?
Tea bags are cheaper and easier to find at the grocery store, but tea bags typically contain fannings or tea dust, which are broken remnants of tea leaves. These remnants were either purposefully crushed for packaging into tea bags or are the leftover fragments after the loose leaf teas are packaged. In contrast, loose leaf teas cost more than their tea bag counterparts and are primarily found in tea specialty stores, but the leaves are much bigger than the fannings found in tea bags. The primary difference between loose leaf and tea bags are the size of the tea leaves, which will affect taste and brew time. Tea leaf sizes do not always correlate to the quality of the tea [5].
Where tea brewing is concerned, fannings have a much greater surface-area-to-volume ratio due to the small particle size, and so will brew much quicker than loose leaf teas. Furthermore, crushed tea leaves may increase the strength of the brewed tea [5]. However, loose leaf teas generally offer more complex, nuanced flavor profiles which tea bags lack. The form of tea to use for brewing kombucha overall depends on personal taste preferences.
Sugar
Which sugar?
At first glance, white sugar seems like the only option, given its ubiquity. For those wishing to experiment a little further, there is no reason to try other sugar sources, since the sugar-metabolizing microbes in SCOBY are not sucrose-specific. There are a couple of notes to consider when choosing the type of sugar:
Brown sugar is sucrose sugar that contains molasses, which may add a molasses flavor to the kombucha.
Raw sugar tend to have bigger crystals, since it is less refined. Bigger sucrose particles may affect its ability to completely dissolve in the kombucha, especially at or below room temperature. If the sugar crystals are not completely dissolved, there may be less sugar in solution available for the bacteria and yeast to metabolize. This could perhaps lead to a more yeasty, rather than fizzy kombucha.
Honey is a mixture of glucose and fructose, with its golden color deriving from non-sugar components such as pollen. Other microorganisms may also be found in honey [6], so using honey for brewing kombucha runs the risk of microbial contamination which may affect SCOBY efficacy.
Sugars extracted from plants or trees other than beets and sugar canes are fair game for brewing kombucha. A few examples include maple syrup, coconut sugar, and palm sugar. Agave nectar, despite health claims, contains a higher fructose content by weight than high fructose corn syrup [7].
Sugar substitutes, such as stevia, xylitol, and glycerol, are sugar alcohols. SCOBY is unable to metabolize sugar alcohols, and so adding artificial sweeteners would not be effective at all in brewing kombucha.
How much sugar?
In kombucha, sugar is used as a food source for the SCOBY, not as a sweetener as in many other recipes. The end product has far less sugar than was originally added to the first fermentation period, as the SCOBY has metabolized most of it to create the vinegary flavor and carbonation. Therefore, adding sugar is necessary for successful fermentation.
Too little sugar, and the SCOBY does not have the necessary fuel to undergo prolonged fermentation, leading to an unsweet, not very acidic, and possibly flat kombucha. Too much sugar may cause the yeast to over-proliferate, outnumbering the other SCOBY microbes. This both decreases the efficacy of the SCOBY and decreases the flavor and carbonation of the resulting kombucha. The exact amount of sugar varies among recipes, and can be experimented with to suit personal preferences.
Flavorings
For a more unique kombucha, flavors are often added near the end of the kombucha brewing process, after the batch has undergone its initial fermentation period. Just like every other component that goes into kombucha, the choices for flavoring are abundant.
Herbs and spices: Since herbs and spices tend to have strong flavors, adding a little bit can go a long way. Keep the amount to a minimum, as some herbs and spices may contain antimicrobial activity, and adding too much may harm the microbes on SCOBY, making the second fermentation period unlikely to occur successfully.
Fruits: Whether fresh fruit or fruit juice is used, be sure to keep an eye on the batch after adding the fruits. Fruits and fruit juices introduce an extra sugar source for the SCOBY during the second fermentation period; the yeast cultures in the SCOBY go into “overdrive” with this added amount of sugar. While this may lead to a fizzier kombucha, the increased carbonation will create a pressure-build up within the container. Opening the container may risk a small kombucha explosion or the container may burst open from the pressure built up.
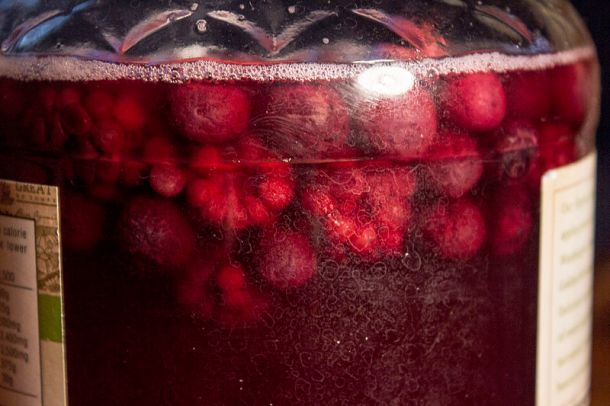
Kombucha flavored with raspberries. Photo credit: Lukas Chin (Wikimedia Commons)
Extracts and infused waters: Like herbal teas, be sure that the extracts are oil-free as to avoid volatiles that contain anti-microbial activity. A few examples of water-based extracts would be lemon extract (not lemon oil), almond extract, and vanilla. Infused waters include rose water and orange blossom water.
With a little bit of background knowledge, kombucha brewing could become your favorite science project. Explore the possibilities!
References cited
- Marsh, A. J., O’Sullivan, O., Hill, C., Ross, R. P., Cotter, P. D. Sequence-based analysis of the bacterial and fungal compositions of multiple kombucha (tea fungus) samples. Food Microbiology, April 2014; 38:171-178.
- C. Fugelsang, “Zygosaccharomyces, A Spoilage Yeast Isolated from Grape Juice.”
- Types of Tea. TeaSource. 2013.
- Thosar, N., Basak, S., Bahadure, R. N., Rajurkar, M. Antimicrobial efficacy of five essential oils against oral pathogens: An in vitro European Journal of Dentistry, Sept 2013; 7:71-77.
- Does the size of your tea leaf matter? Octavia Tea. 18 November, 2011.
- Olaitan, P. B., Adeleke, O. E., Ola, I. O. Honey: a reservoir for microorganisms and an inhibitory agent for microbes. African Health Sciences, Sept 2007; 7(3):159-165.
- Bowden, Jonny. Debunking the Blue Agave Myth. Huffington Post. 17 April, 2010.
 About the author: Alice Phung once had her sights set on an English degree, but eventually switched over to chemistry and hasn’t looked back since.
Read more by Alice Phung


 About the author: Alice Phung once had her sights set on an English degree, but eventually switched over to chemistry and hasn’t looked back since.
![Figure 1: The weight loss (moisture loss) from New York strip steak at varying temperatures ranging from 120-160°F [6].](https://scienceandfooducla.files.wordpress.com/2016/01/sousvide2.jpg)


![[Photo Credit: Vince C Reyes]](https://scienceandfooducla.files.wordpress.com/2015/01/img_0812.jpg)
![Figure 1: Molecular Formula of Ethanol [Image Credit: Vince C Reyes]](https://scienceandfooducla.files.wordpress.com/2015/01/ethanol.jpg)
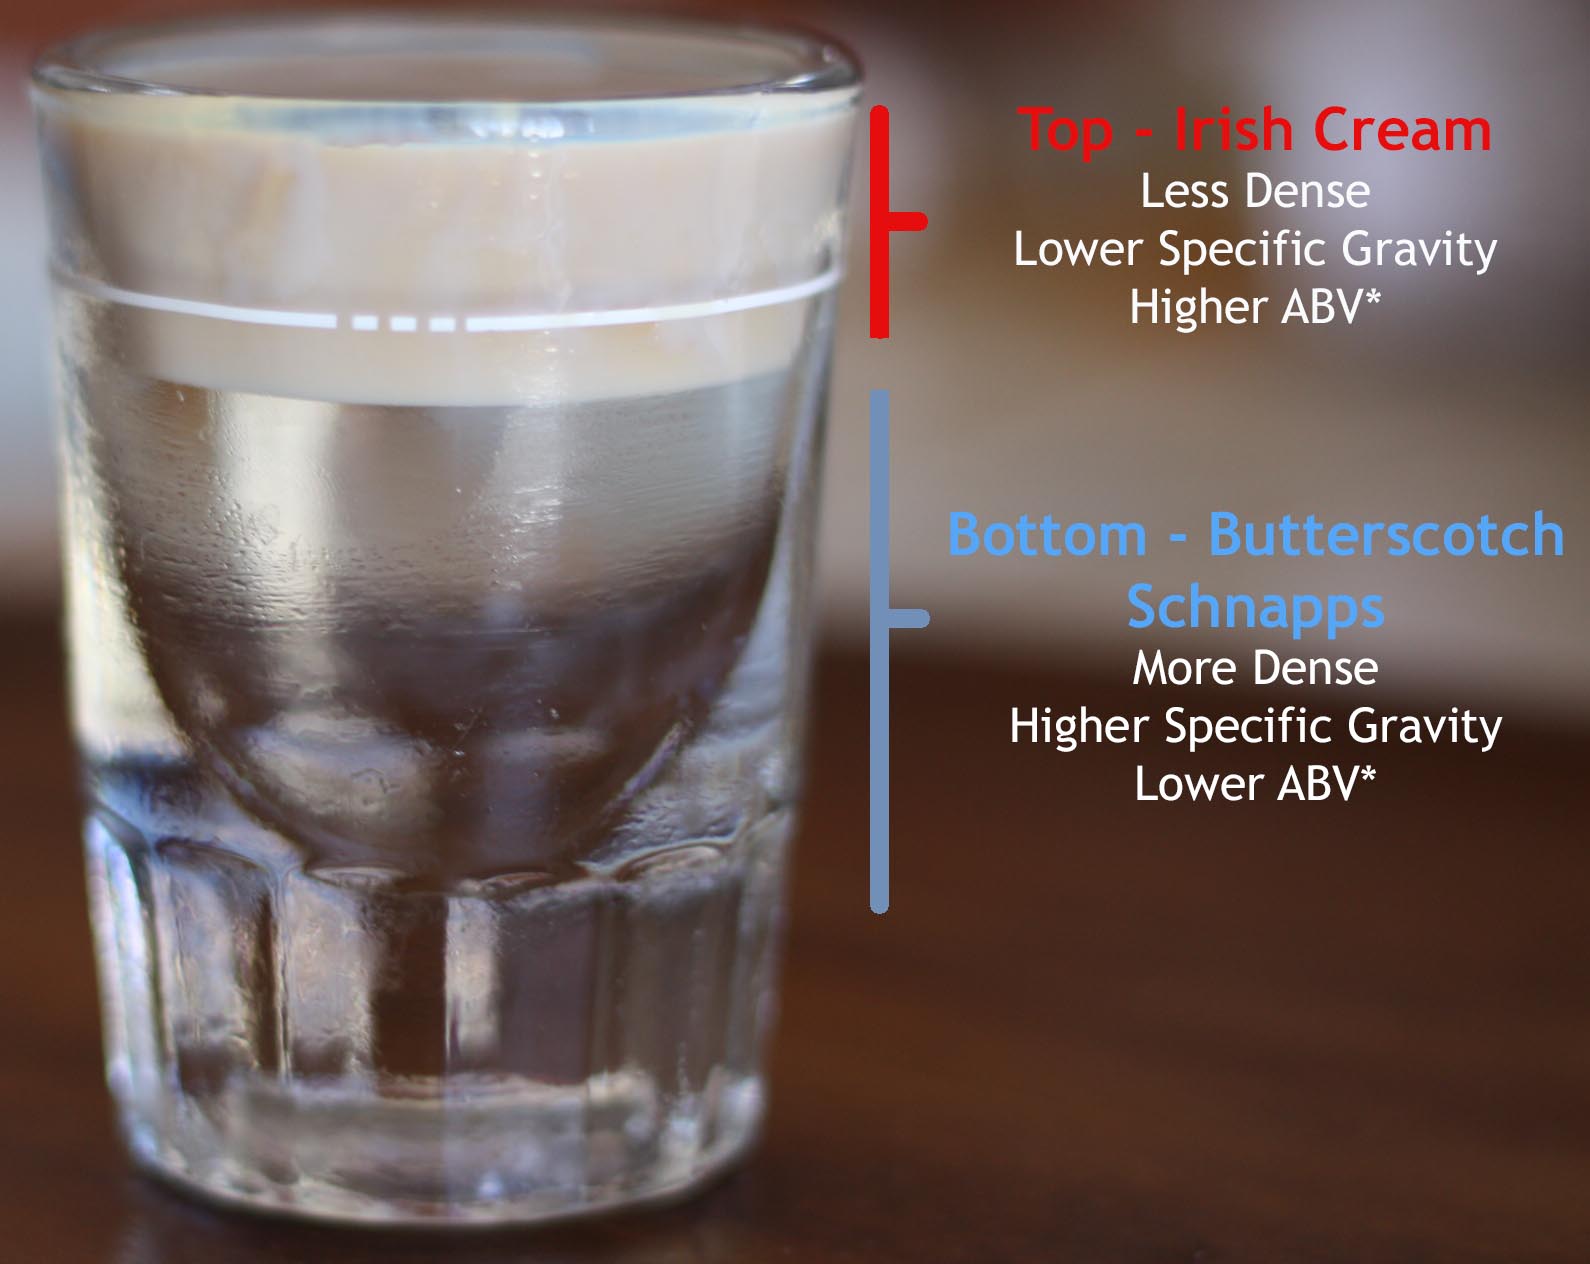
![Figure 2: Layering in a Buttery Nipple. *ABV is not always an indicator of density. [Image Credit: Vince C Reyes]](https://scienceandfooducla.files.wordpress.com/2015/01/diagram.jpg)


