Perfectly Unsoggy Apple Pie

The Science of Pie – June 1, 2014
Honorable Mention Pie
Alexis Cary & Matthew Copperman (Team On the Road)

If you’ve baked an apple pie, you have probably encountered the dreaded problem of a soggy pie crust.

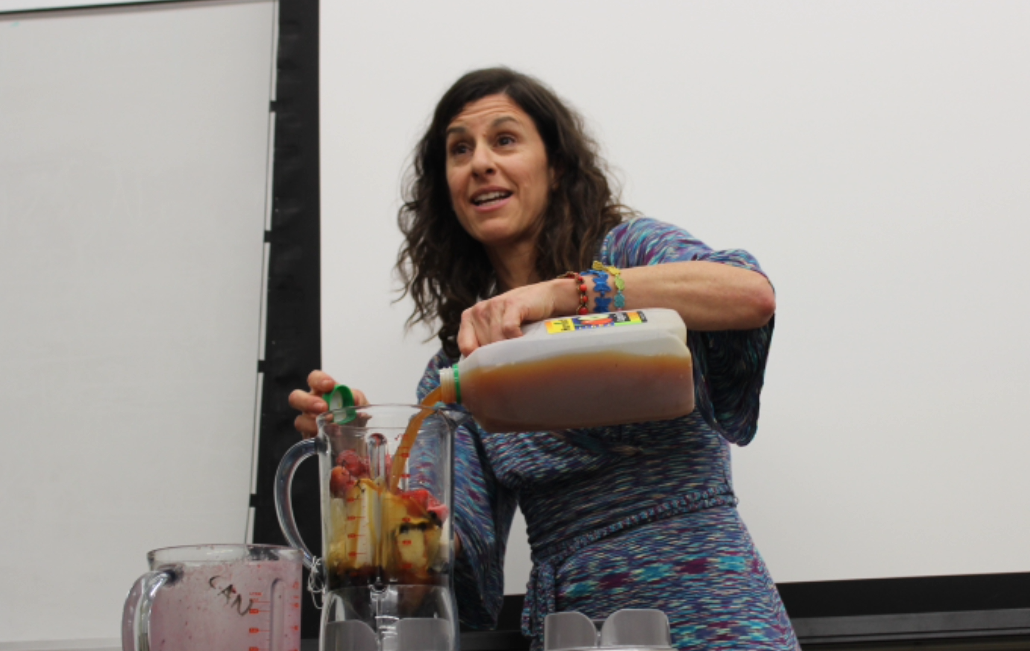
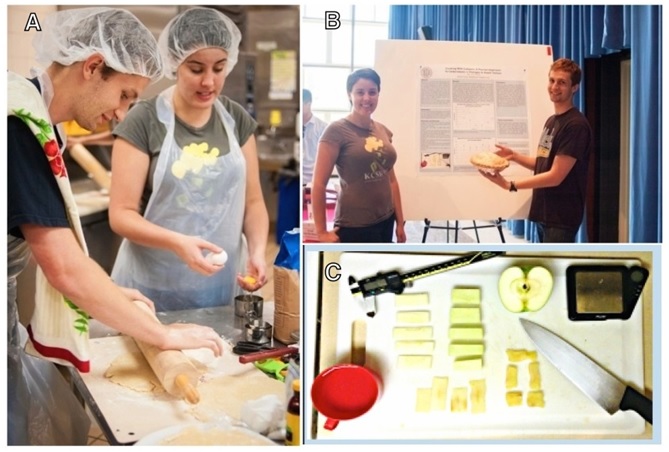
The student scientists of Team On the Road sought to solve this pie-baking mishap by determining the optimal apple slice thickness; the idea was that apple slices of varying thickness would release different  amounts of water when baked, with more water released giving rise to a soggy crust. To investigate the effect of apple slice thickness, they cooked apples of different slice geometries, and measured the “elastic modulus”, which is how much the apple pieces deform in response to a given applied mass.

Team on the Road

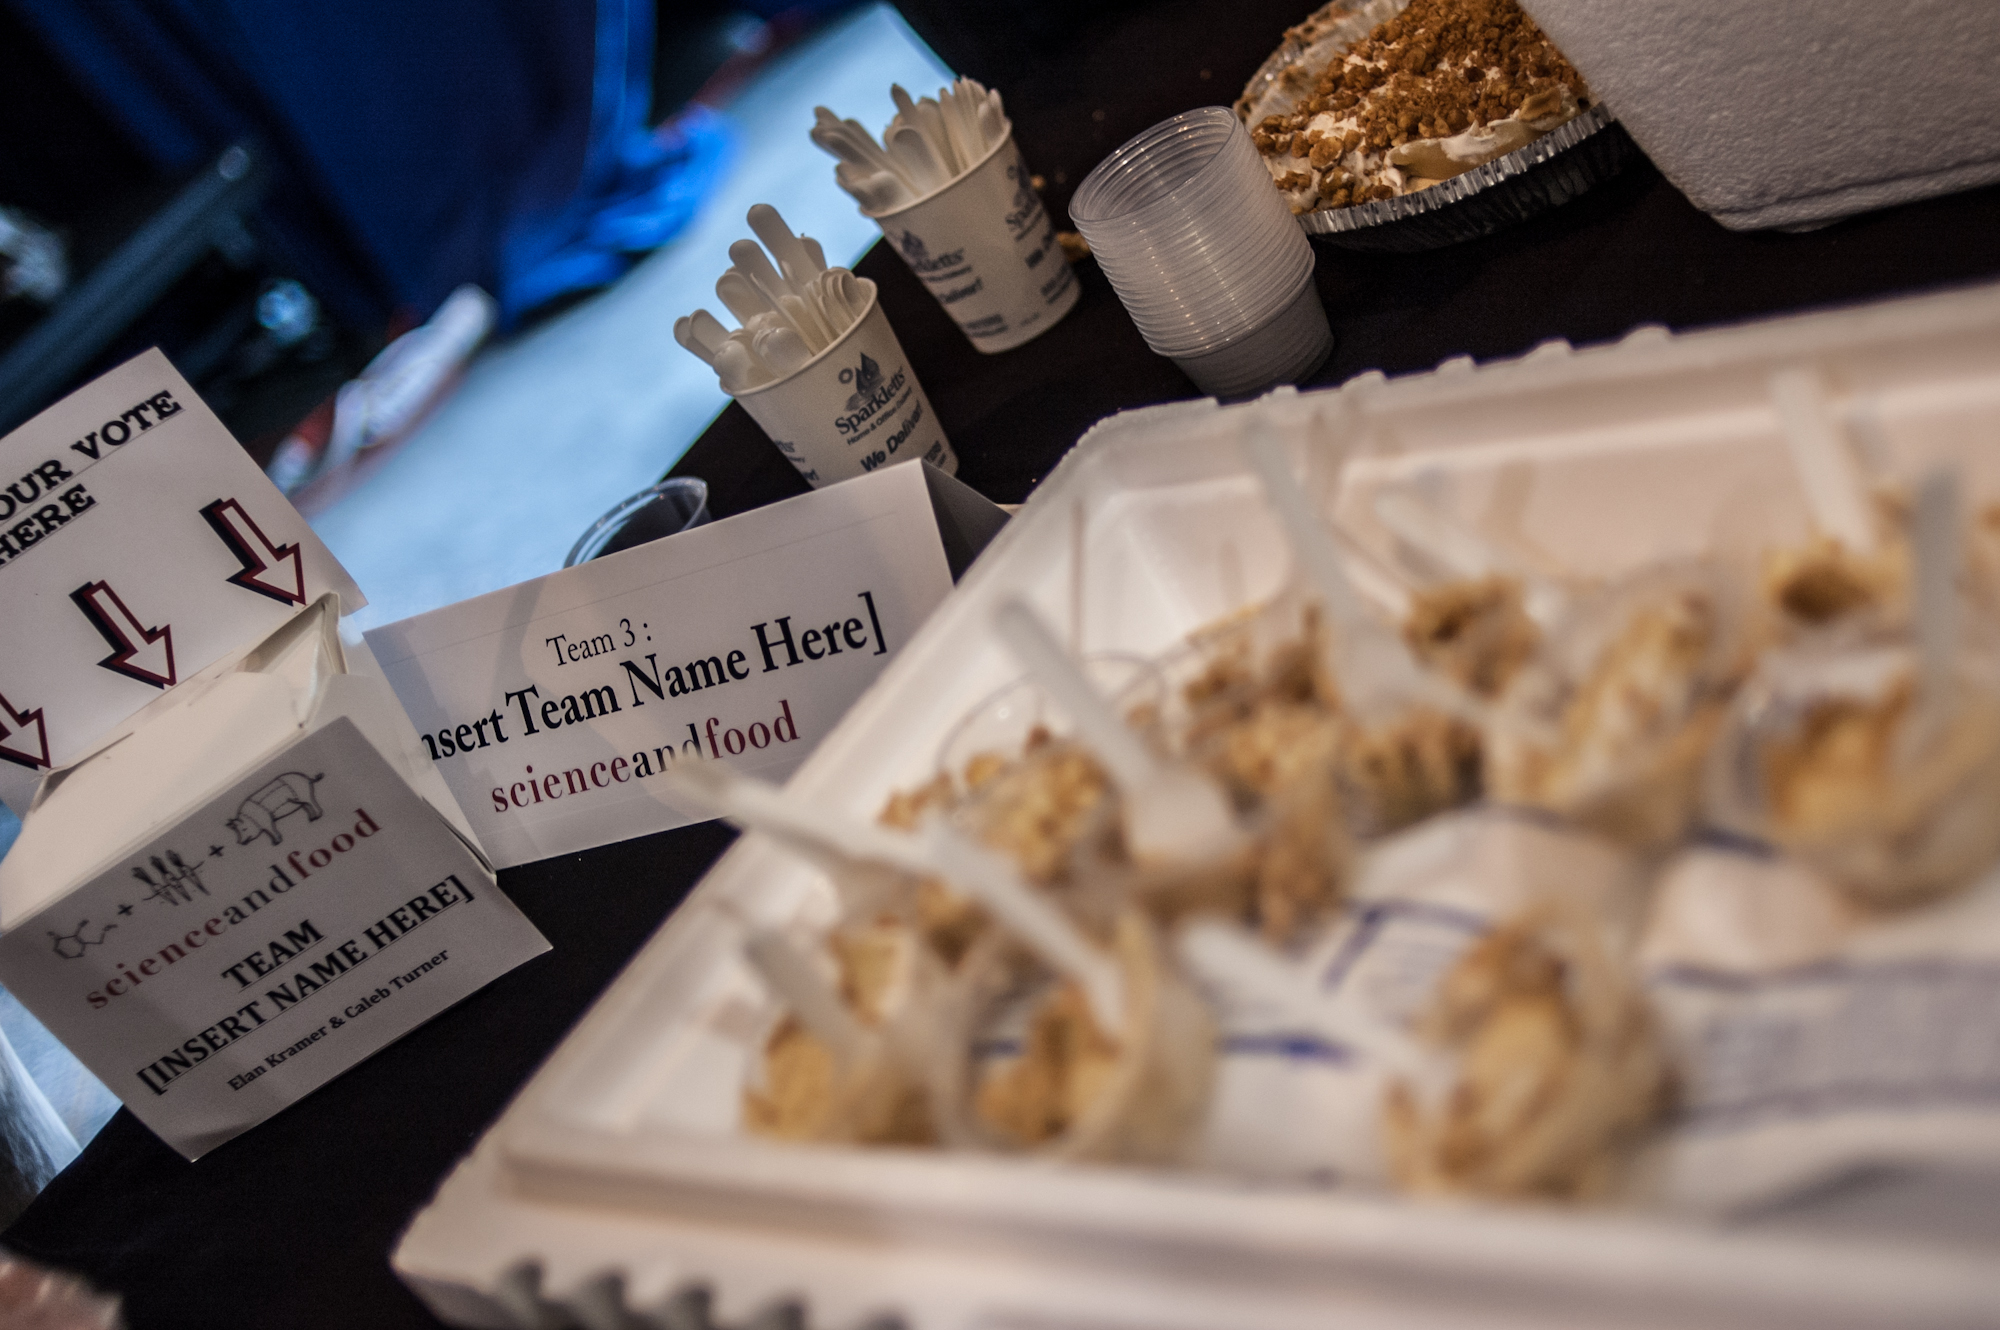
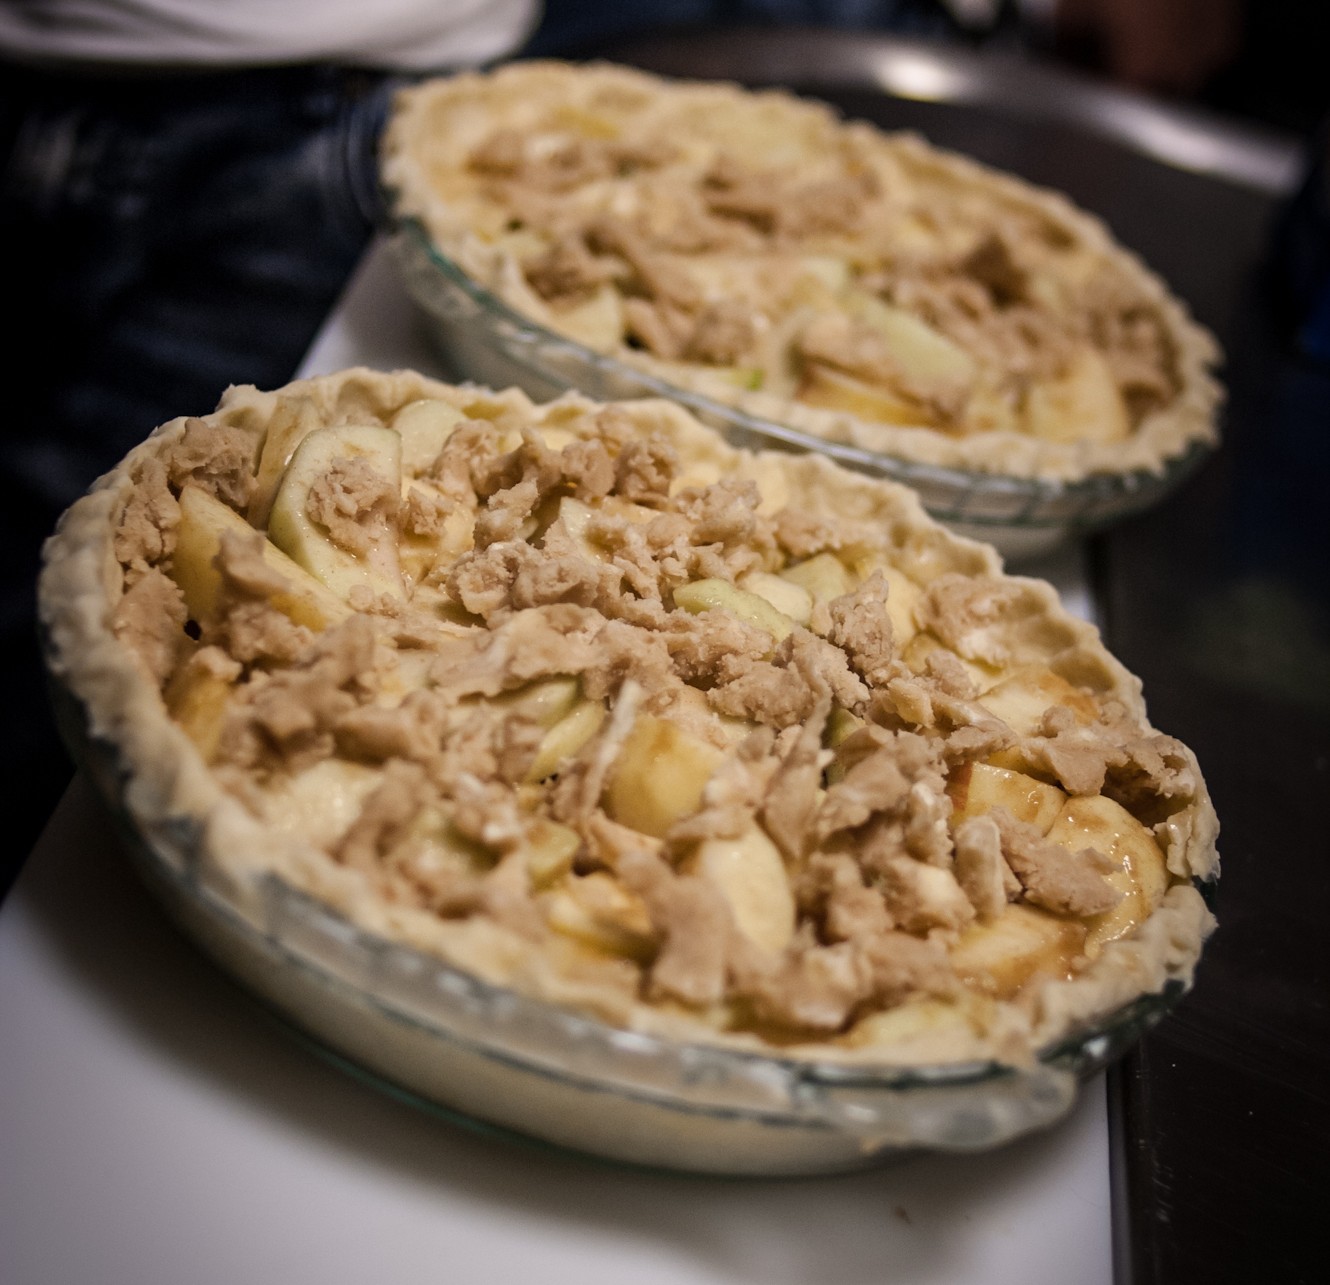
(A) Copperman rolls out the pie crust while Cary prepares ingredients. (B) The team presents their pie and poster at the 2014 Science of Pie event. (C) The team tested the elastic modulus of apple slices of varying thicknesses. Photos (A) and (B) courtesy of Patrick Tran. Photo (C) courtesy of Team On the Road.

The team prepared five different samples of apple slices with thicknesses: 3mm, 6mm, 9mm, 12mm, and 15mm. The apples of each thickness group were recorded for mass and elastic modulus before and after being baked for 20 minutes at 375°F.

Avg Elastic Modulus vs. Thickness of Cooked & Uncooked Apple Slices

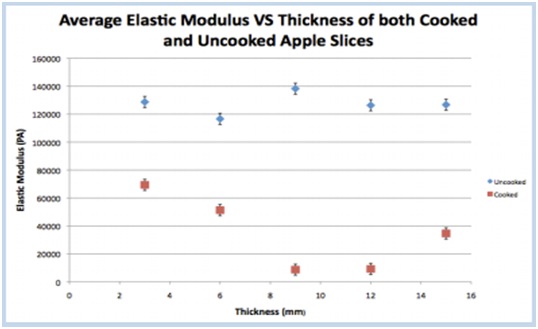
The elastic modulus is shown as a function of slice thickness for uncooked (blue) and cooked (red) apples.

The thinnest apple slices (3mm) had the least change in elastic modulus. In fact, as the slices increased in thickness, they showed increased deformation in apple shape and texture after cooking. There is an exception for the thickest apple slice (15mm), which the team attributes to the thickest apples not being fully cooked in 20 minutes. Because the thinnest apple slices maintained their firm texture and released the least amount of water, Team On the Road used extremely thin apple slices in their final pie. Soggy pie crusts, begone! Thin apple slices are here to save the day!

Note: While the team cut their slices by hand, we recommend using a mandoline to achieve uniformly thin slices of applies.

Recipe
Perfectly Unsoggy Classic Apple Pie

For the crust:
2 1/2 cups unbleached all-purpose flour, plus extra for dusting
2 tablespoons granulated sugar
1 teaspoon table salt
4 tablespoons cold vegetable shortening, cut into 8 pieces
16 tablespoons cold unsalted butter, cut into 16 pieces
6 – 8 tablespoons ice water

For the filling:
3/4 cup granulated sugar
2 tablespoons all-purpose flour
1 teaspoon lemon zest from 1 medium lemon
1/4 teaspoon table salt
1/4 teaspoon ground nutmeg
1/4 teaspoon ground cinnamon
1/8 teaspoon ground allspice
1 lemon’s worth of lemon juice
2 pounds Granny Smith apples, peeled, cored, and sliced as thin as possible (approx. 1/8” is as small as this team consistently achieved.)
1 pounds Gala apples, peeled, cored, and sliced the same as the Granny Smith Apples

For assembly:
1 egg white, beaten lightly
1 tablespoon granulated sugar, for topping
Adjust oven rack to lowest position, place rimmed baking sheet on rack, and heat oven to 400 °F.

To prepare the crust:
Process flour, sugar, and salt together in food processor until combined, about 5 seconds.  Scatter shortening over top and pulse mixture for 5 times, 2 seconds each pulse.

Scatter butter over top and pulse mixture until it resembles coarse crumbs, about 10 pulses.  Transfer mixture to large bowl.

Add 3 tablespoons ice water over the mixture. Stir and press dough together. (The team used a stiff rubber spatula.)  Add 3 more tablespoons of water and mix until dough sticks together. Continue to add remaining ice water, less than 1 tablespoon at a time, as needed until the dough comes together.

Divide dough into two even pieces. Next, it is very helpful to lightly flour counter, hands, and rolling pin. Roll out dough into 12-inch diameter circles and transfer one of the circles into pie pan.  Let excess dough hang over the edge.  Press dough lightly into the bottom, corners and edges of pan.

Wrap in plastic wrap and refrigerate for at least 1 hour. Wrap the other pie crust dough in plastic wrap and refrigerate.   Refrigeration is important for allowing gluten strands to relax (so the dough becomes easier to roll out), and for letting letting liquids incorporate to moisturize the dough.

To prepare filling:
Mix sugar, flour, lemon zest, salt, nutmeg, cinnamon, and allspice together in large bowl.  Add lemon juice and apples and toss until combined.  Let apples sit in mixture for 5-10 minutes.

To assemble the pie:
Remove pie dough from refrigerator.

Pour apples into the dough-lined pie pan, adding about half of the liquid from the apple mixture to the pie pan. Spread apples so that they create a slight mound in the middle.

Loosely roll remaining dough round around rolling pin and gently unroll it onto filling. Trim overhang to 1/2 inch beyond lip of pie plate. Pinch edges of top and bottom crusts firmly together, pressing overhanging dough towards the pie pan until it lies flush with the pan.

Crimp dough evenly around edge of pie using your fingers. Cut a 2-inch “X” into the upper crust. Brush surface with beaten egg white and sprinkle evenly with remaining 1 tablespoon sugar.

Place pie on heated baking sheet, and bake for 30 minutes. Rotate pie and bake for an additional 30 minutes. Crust should be golden brown. If necessary cook for up to 10 minutes longer.

Let pie cool on wire rack. Serve at room temperature.


Eunice LiuAbout the author: Eunice Liu is studying Neuroscience and Linguistics at UCLA. She attributes her love of food science to an obsession with watching bread rise in the oven.

Read more by Eunice Liu


Anyone Can Be a Kitchen Scientist

If anyone can cook, then anyone can do science! (Photo credit: Pixar)

If anyone can cook, then anyone can do science! (Photo credit: Pixar)

“Anyone can cook!” declared Chef Auguste Gusteau in the classic animated film Ratatouille. We’ll go a step further: with a little cooking know-how and access to a kitchen anyone can do science. Each spring the students of the Science & Food undergraduate course prove us right as they research and experiment their way toward apple pie enlightenment.

But you don’t have to be a student in our course to be a savvy kitchen scientist. One of our younger readers, Vincent, recently won his local seventh grade science fair by carefully crafting and conducting his own kitchen experiment. By baking cookies with different temperatures of light (reduced fat) butter, Vincent determined that frozen butter creates a chewier cookie than melted butter. His scientifically proven chewy chocolate chip cookie recipe appears at the end of the article.

Vincent’s project is a great example of a successful kitchen experiment. For those of you who are avid kitchen experimenters or are thinking of dipping a toe into the world of kitchen science, we’ve summarized the key features of Vincent’s project that will help make any (kitchen) science experiment a success.

Vincent’s winning science fair project.

Vincent’s winning science fair project.

A close-up of Vincent’s project. Note the number of cookies baked for each butter condition.

A close-up of Vincent’s project. Note the number of cookies baked for each butter condition.

Keys to a successful (kitchen) experiment

A questionScientific research has to start somewhere, and it almost always starts with a thought-provoking question. Why is the sky blue? Why do apples fall from trees? In this case Vincent wanted to know how the temperature of butter affects the chewiness of chocolate chip cookies.

A testable hypothesis – Once researchers have a question in mind, they need to come up with a testable hypothesis. The key word here is testable. Having a testable hypothesis guides researchers as they design effective experimental procedures. Based on a bit of background research and a dash of reasoning, Vincent hypothesized that cookie chewiness would be directly proportional to the temperature of the butter (hotter butter = chewier cookie). Vincent knew he could directly test his hypothesis by baking cookies with different butter temperatures and having a panel of tasters rate the chewiness of each cookie.

A carefully controlled experiment – When designing an experiment, it’s crucial to only change one variable, or component, at a time. Vincent was careful to only test one factor—butter temperature—and keep everything else in the experiment constant.

A large enough sample sizeOnce you’ve perfected your experimental design, repeat, repeat, repeat! Mistakes happen. And even the most thoughtfully executed experiments can go haywire because of factors beyond our control. Ovens have hot spots. Humidity can change the moisture of dough. To help avoid these potential pitfalls, Vincent made eight cookies at each butter temperature and had five different taste-testers rate the cookies.

A thoughtful analysis of the results – At the end of it all, what good is a bunch of data if it doesn’t actually mean anything useful? Based on his taste test, Vincent found that frozen butter produced the chewiest cookies, the exact opposite of his hypothesis! Like a true scientist, Vincent discounted his original hypothesis and offered up some pretty insightful ideas to explain his observations:

“The cookies with melted light butter were the least chewy, almost crunchy. I think this happened because, since there was more moisture in the batter with the melted butter, the cookies spread out more and got flat, exposing more surface area. This caused more water to evaporate quickly.”

A follow-up experimentThe work of a scientist is never done. Answering one question inevitably opens the doors to many more. As for Vincent, he’ll likely be back in the kitchen repeating his experiment with regular butter instead of light butter. “Doing this again,” he wrote in his report, “would not be a problem at all since I love baking and eating cookies!”

Do you experiment in the kitchen?
Write to us at scienceandfooducla (at) gmail (dot) com and tell us about your best kitchen experiment. We’ll feature our favorite feats of kitchen science on the site!


Vincent’s Scientifically-Tested Chewy Chocolate Chip Cookies
Adapted from Mel’s Kitchen Café

Ingredients

1 cup light butter, frozen and cut into cubes
1 cup granulated sugar
1 cup packed light brown sugar
3 large eggs
1 teaspoon salt
1 teaspoon vanilla
1 1/2 teaspoons baking soda
3 1/2 cups flour
2 cups chocolate chips


Directions

Preheat oven to 350 degrees. Cream butter and both sugars together until well mixed. Add eggs and mix for 2-3 minutes, until the batter is light in color. Add salt, vanilla, baking soda and mix. Add flour and chocolate chips together and mix until combined.

Drop cookie batter by rounded tablespoon onto parchment paper or silpat lined baking sheets and bake for 10 minutes until lightly golden around edges but still soft in the center.


Liz Roth-JohnsonAbout the author: Liz Roth-Johnson earned her Ph.D. in Molecular Biology at UCLA. If she’s not in the lab, you can usually find her experimenting in the kitchen.

Read more by Liz Roth-Johnson


Tri-Color Potato Salad

“There’s so much great food yet to discover that we can grow, so I just love discovering new varieties, crops, things that our customers and myself have never tried before.”
                                                                          – Alex Weiser, 2013 Science & Food course Read more

Fancy Chocolate Treats

Photo credit: Jesús Rodriguez (hezoos/Flickr)

Photo credit: Jesús Rodriguez (hezoos/Flickr)

Chocolate-covered strawberries have an innate beauty in their simplicity, making this snack both sweet and decadent. But this gourmet treat does not have to be expensive nor only savored at special events. Although it’s not quite as simple as dipping strawberries into soupy chocolate sauce, you can easily make chocolate-covered strawberries in your very own kitchen with a basket of strawberries, a bag of chocolate, and a little patience.

To perfect the crafting of chocolate-covered strawberries, it helps to first consider the composition of chocolate. Chocolate contains only a few ingredients: fat, sugars, proteins, and soy lecithin as emulsifier that holds everything together [1,2]. Cocoa butter, a fat that is derived from cocoa beans, makes up the majority of chocolate. Like many vegetable fats, cocoa butter is a mixture of fatty molecules called triacylglycerols. Different types of triacylglycerols—saturated, monounsaturated, polyunsaturated—have their own thermal and structural properties. Roughly 80% of cocoa butter are monounsaturated triacylglycerols [3]. The secret to chocolate perfection lies in the microscopic arrangement of these molecules. The texture (smooth vs. lumpy), appearance (glossy vs. dull), and melting temperature of chocolate (in your mouth at 98°F vs. in your hand at 82°F) all depend on how triacylglycerols pack together in the finished chocolate product.

Triacylglycerols are elongated, spindly molecules that can be packed together in different ways, sort of like long, skinny Legos. The three main ways that triacylglycerols can pack together are named α, β’, and β [3]. A pure mixture of triacylglycerols will form the most stable structure, β [4], and quality chocolate that is hard, smooth, and shiny will predominantly contain this β structure. Unfortunately, cocoa butter isn’t purely one type of triacylglycerol: while the 80% monounsaturated triacylglycerols will tend to pack together nicely into perfect β structures,  the other 20% of cocoa butter fat molecules can interfere and lead to less stable α or β′ structures. As shown in Table 1, chocolate can take on different combinations of α, β′, and β structures, categorized in order of increasing stability as crystals I-VI [2,3]. Crystal V possesses only the β structure, and so it boasts the most desirable chocolate characteristics, such as good sheen, satisfying snap, and melt-in-your-mouth smoothness.

Table 1. Properties of chocolate crystals (adapted from [2]).

Crystal Structure Melting Temp (°F) Chocolate Characteristics
I β′sub(α) 63 Dull, soft, crumbly, melts too easily
II α 70 Dull, soft, crumbly, melts too easily
III β′2 79 Dull, firm, poor snap, melts too easily
IV β′1 82 Dull, firm, poor snap, melts too easily
V β2 93 Glossy, firm, best snap, melts near body temp
VI β1 97 Hard, takes weeks to form

Unfortunately, getting chocolate to form the desired crystal type is easier said than done. When chocolate is melted and then left alone to re-harden on its own terms, uncontrolled crystallization occurs: any and all of the six crystal types will form at random. Chocolate that has been allowed to set this way ends up clumpy and chalky. To control crystallization and select for crystal V, the chocolate must be tempered. Through the tempering process, chocolate is first heated to 110-130°F to melt all the different crystal types. Most importantly, the temperature has to be higher than 82°F to melt the inferior crystals I-IV. Melted chocolate is then cooled down by adding “seeds” of chocolate that already contain only crystal V. These seeds are usually just pieces of chocolate that has already been tempered. Any piece of chocolate—chips, buttons, or chopped— can be used, as the majority of chocolate on the market has already been tempered. These seeds slowly cool the melted chocolate and act as a molecular template from which additional crystal V structures can grow [3]. As the chocolate cools, the stable crystal V will come together into a dense, even network, creating that lustrous, firm chocolate coating.

But beware: a drop of water can ruin all that hard work and perfectly tempered chocolate by causing it to seize. During the manufacturing process, water is removed from the chocolate, leaving behind a blend of fats and sugars. Introducing water to melted chocolate causes the sugar molecules to clump together in a process known as seizing [1]. These wet, sticky sugar clusters result in a grainy, thick batch of chocolate.

Seizing can happen when chocolate is melted in a double boiler, as water from the steam can get into the chocolate. It can also happen when pockets of chocolate are accidentally burnt. Burning is a chemical reaction that oxidizes the fats and sugars to produce carbon dioxide and water. Water that forms in the burnt pockets of chocolate will cause the rest of the batch to seize. But have no fear! Seized chocolate is not completely ruined: it can be saved by adding even more water or other liquids such as cream. Though it may seem counterintuitive, adding more water actually dissolves the sugar clumps, breaking them apart so that the chocolate can become smooth and creamy again [1]. Unfortunately, because there is now moisture in the chocolate, it will not dry and harden into a chocolate shell anymore. Chocolate rescued in this way can be used for hot chocolate, icings, fillings, or ganaches, which means you can still make an impressive chocolate treat even if the chocolate-covered strawberries don’t work out.


Chocolate-Covered Strawberries

1 lb. strawberries
16oz milk chocolate chips
Thermometer (optional, but would be helpful)

1. Melt half to two-thirds of the chocolate chips…

…In a double boiler: Stir constantly. Be sure steam doesn’t escape and sink into the chocolate. Do not cover.

…In the microwave: Heat on high 1 minute. Do not cover. Remove from the microwave and stir. If all the chocolate has not melted, heat again for 5-10 seconds. Repeat until completely melted
Note: If possible, avoid using a heat-retaining container like glass, which may burn the chocolate. Plastic is preferred.

2. Once completely melted, carefully continue heating until the temperature is 90-95°F.

3. Remove from heat, then add chocolate chips. Stir until the chips have melted and the chocolate is 82-88°F.

4. To test if the chocolate is ready, spread a thin layer on the back of a spoon or a piece of paper. It should harden in less than 3 minutes. If it doesn’t, stir in more chocolate chips.

5. When the chocolate is ready, carefully dip in strawberries. Make sure the strawberries are dry, before dipping. Allow dipped strawberries to dry on a sheet of parchment paper.


References Cited

  1. Corriher, S. Chocolate, Chocolate, Chocolate. American Chemical Society: The Elements of Chocolate. October 2007; <http://acselementsofchocolate.typepad.com/elements_of_chocolate/Chocolate.html>
  2. Loisel C, Keller G, Lecq G, Bourgaux C, Ollivon M. Phase Transitions and Polymorphism of Cocoa Butter. Journal of the American Oil Chemists’ Society. 1998;  75(4): 425-439.
  3. Rowat A, Hollar K, Stone H, Rosenberg D. The Science of Chocolate: Interactive Activities on Phase Transitions, Emulsification, and Nucleation.  Journal of Chemical Education. January 2011; 88(1): 29-33.
  4. Weiss J, Decker E, McClements J, Kristbergsson K, Helgason T, Awad T. Solid Lipid Nanoparticles as Delivery Systems for Bioactive Food Components. Food Biophysics. June 2008; 3(2): 146-154

Alice PhungAbout the author: Alice Phung once had her sights set on an English degree, but eventually switched over to chemistry and hasn’t looked back since.


Super Antioxidant Fruit Smoothie

If you take a look at the Nutrition Facts panel on your favorite snack, you can learn a lot about the different molecules in your food. These molecules—fats, proteins, carbs, vitamins, and minerals—are essential for our health: they provide energy for our bodies and can be recycled to form the molecular building blocks of our cells. Many of these molecules even promote specific molecular processes: Vitamin C helps build the collagen in connective tissue [1], while iron allows oxygen to bind red blood cells and be transported through the body [2].

NutritionFacts

But there’s an entire class of nutrients you won’t find listed in the Nutrition Facts: phytonutrients. While phytonutrients (also called phytochemicals) are not essential for our survival, they can have beneficial effects on our health. Trendy “superfoods” are often high in phytonutrients like resveratrol, flavonoids, or antioxidants.

This fruit smoothie recipe from Dr. Dena Herman packs a big punch of antioxidants thanks to a generous serving of antioxidant-rich berries. Antioxidants are a large group of chemicals that have the ability to counteract a process called oxidation. A material is “oxidized” when it loses electrons through a chemical reaction; antioxidants can impair this process by giving up electrons and becoming oxidized themselves. For example, apples that are cut and exposed to the air will quickly turn brown as oxygen interacts with and oxidizes molecules in the fruit’s tissue. Lemon juice can prevent this oxidative browning because it contains antioxidant molecules like Vitamin C.

In our bodies, oxidation can lead to cellular damage by breaking down important molecules like proteins, fats, and even DNA. Molecules that promote oxidative damage not only come from environmental factors like air pollutants, smoke, and UV radiation, but can also come from our own bodies as a byproduct of many cellular and metabolic processes. Our bodies are equipped to deal with moderate amounts of damage; however, extensive “oxidative stress” can wreak havoc on our cells and may contribute to the development of cancer, insulin resistance, and several cardiovascular and neurological diseases [3,4]. Consuming foods rich in antioxidants is thought to help counteract such harmful oxidative stress.

DenaHermanSmoothie

Dr. Herman prepares her Super Antioxidant Fruit Smoothie during a 2013 Science & Food course lecture.

The Recipe:
Makes about 4-6, 8 oz glasses

1 package silken tofu or soft tofu
1–1½ bananas
2 cups mixed frozen berries*
2–3 tbsp apple juice concentrate
Water or unfiltered apple juice, enough to blend

*Other types of frozen fruit will work, but do not include citrus as it will curdle with tofu. Berries are used in this recipe because they are a great source of antioxidants.

  1. Blend all ingredients in a blender until smooth.
  2. Adjust to desired consistency by adding more water or unfiltered apple juice.
  3. Serve immediately and enjoy!


Online Resources

  1. USDA Agricultural Research Service, “Phytonutrient FAQs”
  2. Harvard School of Public Health, “Antioxidants: Beyond the Hype”
  3. NIH MedlinePlus, “Antioxidants”
  4. Scientific American, “Is the Free-Radical Theory of Aging Dead?”
  5. NIH Research Radio Podcast on Resveratrol


References Cited

  1. Van Robertson WB, Schwartz B (1953) Ascorbic acid and the formation of collagen. J Biol Chem 201: 689–696.
  2. Dallman PR (1986) Biochemical basis for the manifestations of iron deficiency. Annu Rev Nutr 6: 13–40. doi:10.1146/annurev.nu.06.070186.000305.
  3. Houstis N, Rosen ED, Lander ES (2006) Reactive oxygen species have a causal role in multiple forms of insulin resistance. Nature 440: 944–948. doi:10.1038/nature04634.
  4. Figueira TR, Barros MH, Camargo AA, Castilho RF, Ferreira JCB, et al. (2013) Mitochondria as a Source of Reactive Oxygen and Nitrogen Species: From Molecular Mechanisms to Human Health. Antioxidants Redox Signal 18: 2029–2074. doi:10.1089/ars.2012.4729.

Liz Roth-JohnsonAbout the author: Liz Roth-Johnson is a Ph.D. candidate in Molecular Biology at UCLA. If she’s not in the lab, you can usually find her experimenting in the kitchen.

Read more by Liz Roth-Johnson


Chia Seed Apple Pie

Continuing our Science of Pie adventure, we’ve invited Elsbeth Sites of Team Chia to share her pie science project, which examines the use of a very unconventional thickener to tune the viscosity of pie filling.  Elsbeth is an undergraduate student of physiological sciences at UCLA who is passionate about food and writing, especially writing about food.

Have you ever baked a lovely pie, sliced it and placed it gently on your best dessert plates, then watched in despair as the filling fled its warm crust and bled all over the dish? This common and unfortunate experience led our team to investigate the viscosity of pie filling. We hoped to discover a way to produce a pie of perfect viscosity that upon slicing, would not spread over the plate too far, nor be too gelatinous. Most pies contain cornstarch to thicken their fillings. To make our project unique and to put a modern and healthy twist on our pie, we replaced starch with the trendy new superfood: chia seeds.

The outside of the chia seed contains large fibrous molecules called polysaccharides. When the seed is wet, these molecules are exuded from the seed and trap liquid. This allows the seed to hold approximately nine times its own weight in water, causing a bead of gel to form around the seed [1].

Chia seed hydration. Chia seeds can absorb approximately nine times their weight in water. Water absorption creates a mucilaginous gel around the seed. Figures are from [1].

With this knowledge of the chia seed, we posed these questions:

  • How do we create a pie that does not bleed across a plate when sliced while not being overly gelatinous?
  • Can chia seeds be used to increase the viscosity of our pie filling?
  • At what concentration should the seeds be added to the pie to get an ideal viscosity without compromising taste or texture?
Measuring viscosity with the “line spread” test. The line spread test measures the distance a liquid or semiliquid flows across a flat surface. We used a hard, clear, plastic surface marked with concentric circles spread 0.5 cm apart across a 7.5 cm radius. Lines originating in the circles’ center divide the circles into four quadrants. The longest distance traveled by the filling in each quadrant was averaged to find the mean distance that the filling spread.

We defined our perfect filling to be one that spread slightly when placed on a flat surface without remaining too gelatinous and not spreading at all. A traditional apple pie filling prepared with cornstarch spread 5.6 centimeters in 60 seconds. Finding the right concentration of seeds to add was a tedious process, and the heat at which the pie was baked and served greatly affected the pie’s viscosity. As shown in the figure above, our control filling with no thickening agent spread on average 5.9 centimeters in 60 seconds—clearly too runny. The filling to which we added 0.5 teaspoons of chia seeds spread 5.5 centimeters. By evaluating these spread distances and tasting each filling, we agreed that the filling with only 0.5 teaspoons seeds yielded the best viscosity and palatability. Using more seeds than this overpowered the spices in the filling, making the pie taste nutty and giving it a slimy mouthfeel.

Our experiment was successful in that we answered our original questions:

  • Chia seeds can indeed be used to tune the viscosity of apple pie filling.
  • To produce an apple pie of optimal viscosity, replace cornstarch with 0.5 tsp chia seeds per ½ cup of filling. While our pie might appeal to the culinarily curious or health savvy, those who prefer a classic pie may find the seeds of the pie annoying, or might miss the texture that more traditional thickeners like cornstarch or flour provide the filling.

If a seedy apple pie up your alley, here is Team Chia’s recipe for Chia Seed Apple Pie. The truly adventurous might even try using chia seeds in a berry pie where thickening agents are more crucial and tiny seeds are less noticeable. If you do try another variation of a chia seed pie at home, let us know how it goes in the comments below!


Pie Crust
Adapted from Everyday Food: Our Best Pie Crust

2 1/2 cups all-purpose flour, plus more for rolling dough
1 tsp salt
1 tsp sugar
16 tbsp (2 sticks) cold unsalted butter, cut into pieces
4 tbsp ice water, plus 2 more if needed

In a food processor, pulse flour, salt, and sugar several times to combine. Add butter. Pulse until mixture resembles coarse meal, with just a few pea-size pieces remaining.

Sprinkle with 4 tablespoons ice water. Pulse until dough is crumbly but holds together when squeezed with fingers (if needed, add up to 2 tablespoons more ice water, 1 tablespoon at a time). Do not over-process.

Turn dough out onto a work surface; form dough into two 3/4-inch-thick disks. Wrap both separately and tightly in plastic, and refrigerate until firm, at least 1 hour.


Pie Filling and Assembly

5 Granny Smith apples, sliced
3/4 cup granulated sugar
2 1/2 tsp chia seeds
1/2 tsp ground cinnamon
1/8 tsp ground nutmeg
1/2 cup cold water
3/4 cup apple juice

Preheat oven to 350 degrees.

Wash, peel, and core apples. Cut apples into 1/4- to 1/2-inch slices and place in cold water.

Combine sugar, chia seeds, and spices in a large pot with water and apple juice. Stir and cook on medium high heat until mixture thickens and begins to bubble. Boil for 1 minute, stirring constantly. Fold in apple slices immediately and remove from heat.

To assemble pie, roll dough into 2 14-insh rounds. Fit the first crust into the bottom of a 9-inch pie plate. Spoon filling into the pie dish. Cover the pie with the second crust, trimming the overhang to about 1 inch. Press upper and lower crust edges together and flute as desired. Cut steam slits in the center of the top crust.

Bake for 20 minutes at 350 degrees or until crust is golden brown.


References Cited

  1. Muñoz LA, Cobos A, Diaz O, Aguilera JM (2012) Chia seeds: Microstructure, mucilage extraction and hydration. J Food Eng 108: 216–224. doi:10.1016/j.jfoodeng.2011.06.037.

Boozy Apple Pie

On foraging for local ingredients in your college dormitory…

Our Judge’s Favorite winner of the 2013 Science of Pie event showed how beer and vodka affect pie crust color and texture. But they weren’t the only students who experimented with alcohol in their pies. Two other teams—Team Super Rum and the Beam Team—also used alcohol to create flaky, tender crusts. The Beam Team even added Kentucky bourbon whiskey (Jim Beam, of course) to their pie filling for an extra punch of flavor.

So why all the alcohol? According to the Beam Team:

“Our group was inspired by Alex Atala’s process of going out into the Amazon Forest and finding local plants to use as ingredients. As college students, we decided that our ‘native’ ingredient is alcohol since it is easily found in abundant quantities all around us, so we used our two favorite types of hard alcohol: whiskey and vodka.”

There’s another (more scientific) reason for boozing up a pie crust: alcohol creates a more tender, flaky crust than can be easily achieved with water alone. This happens because alcohol and water have very different effects on the formation of springy gluten networks in pie dough.

Gluten develops when two wheat proteins in flour, glutenin and gliadin, are mixed with water. Because parts of these proteins do not like to interact with water, the proteins begin to stick to each other much in the same way oil droplets come together when suspended in water. As a flour-water dough is mixed, the glutenin and gliadin molecules interact to form an extensive elastic network [1].

Gluten development during dough formation. Scanning electron micrographs of gluten networks during early (A), middle (B), and late (C) stages of dough mixing [2]. The development of these gluten networks requires water.

While gluten networks are great for chewy bread dough, they are less than ideal for flaky, tender pie crust. An ideal pie dough has as just enough gluten to hold everything in the dough together. And while gluten development can be minimized by adding only scant amounts of water and handling the dough as little as possible, this is easier said than done.

A more practical solution is to replace some of the water with a liquid that does not promote gluten formation. Unlike water, alcohol inhibits gluten formation. By interacting with the gluten proteins, alcohol molecules limit their ability to stick to each other and form springy networks [1]. Using alcohol in the place of water allows more liquid to be added to the dough while still restricting gluten formation. This results in a softer, more pliable dough that becomes tender and flaky when baked.

TeamSuperRum

Team Super Rum serves their pie and presents their work at the Science of Pie even (left). Test pies made with rum pie crust (top right) or bourbon apple filling (bottom right).

Like the recipe below, the Beam Team paired a vodka pie crust with a decadent bourbon and apple filling. Although vodka is typically used for its subtle flavor, any type of alcohol will prevent gluten formation. As their name suggests, Team Super Rum used rum instead of vodka to create a flaky and uniquely flavored crust. And we bet there are many more delicious possibilities in the realm of alcohol-based pie crusts. If you try this recipe with something other than vodka, share your new pie crust concoction with us in the comments below!


Foolproof Vodka Pie Crust

Cook’s Illustrated, November 2007

2 1/2 cups (12 1/2 ounces) unbleached all-purpose flour
1 tsp table salt
2 tbsp sugar
12 tbsp (1 1/2 sticks) cold unsalted butter, cut into 1/4-inch slices
1/2 cup cold vegetable shortening, cut into 4 pieces
1/4 cup cold vodka
1/4 cup cold water

Process 1 1/2 cups flour, salt, and sugar in a food processor until combined, about 2 one-second pulses. Add butter and shortening and process until homogeneous dough just starts to collect in uneven clumps, about 15 seconds (dough will resemble cottage cheese curds and there should be no uncoated flour). Scrape bowl with rubber spatula and redistribute dough evenly around processor blade. Add remaining cup flour and pulse until mixture is evenly distributed around bowl and mass of dough has been broken up, 4 to 6 quick pulses. Empty mixture into medium bowl.

Sprinkle vodka and water over mixture. With rubber spatula, use folding motion to mix, pressing down on dough until dough is slightly tacky and sticks together. Divide dough into two even balls and flatten each into 4-inch disk. Wrap each in plastic wrap and refrigerate at least 45 minutes or up to 2 days.


Bourbon Apple Pie Filling

2 tbsp all-purpose flour
6 or 7 apples, mix of tart and sweet
1/3 cup sugar
1/2 tsp cinnamon
1/2 tsp nutmeg
1/4 tsp salt
1/2 cup bourbon whiskey
2 tbsp lemon juice
2 tbsp butter cut into small pieces

Preheat oven to 425. Place bottom crust in pie plate.

Peel, core, and halve the apples. Cut into 1/4-inch thick slices, about 7 or 8 cups.

In a 4 quart saucepan, whisk together sugar, flour, cinnamon, nutmeg, and salt. Whisk in bourbon whiskey and lemon juice until evenly blended. Cook over medium heat, whisking frequently until the mixture boils and thickens slightly. Add apples and stir until evenly coated. Continue cooking, stirring continuously, for 3 minutes. Set aside to cool, stirring once or twice for 20 minutes.

Pour apple mixture into the pie shell, mounding apples slightly in the center. Dot with butter and add the top crust. Cut several steam vents into top crust.

Bake 25 minutes at 425. Reduce temperature to 350 and bake 45 minutes longer or until crust is brown and juices are bubbling.

Serve warm or chilled with whipped cream or ice cream.


Online Resources

  1. Pie crust recipe from Cook’s Illustrated via Serious Eats
  2. Bourbon apple pie filling recipe adapted from Group Recipes


References Cited

  1. Technology of breadmaking (2007). 2nd ed. New York: Springer. 397 p.
  2. Amend T (1995) The mechanism of dough forming: Efforts in the field of molecular structure. Getreide Mehl Brot 49: 359–362.

Liz Roth-JohnsonAbout the author: Liz Roth-Johnson is a Ph.D. candidate in Molecular Biology at UCLA. If she’s not in the lab, you can usually find her experimenting in the kitchen.

Read more by Liz Roth-Johnson


Umami Burger

If you have ever enjoyed the savory flavor of soy sauce or the rich, full flavor of Parmesan cheese, then you have experienced the taste sensation known as umami. The term “umami” was first coined in 1908 by Dr. Kikunae Ikeda to describe the unique savory taste of seaweed broth [1,2]. Although umami was initially associated only with Asian cuisines, researchers all over the world have now established umami as one of the five basic taste groups [3].

In his original study of umami, Dr. Ikeda isolated the amino acid glutamate from dried seaweed and found that this molecule was sufficient to create a strong umami flavor [1]. As an amino acid, glutamate is an important component of proteins and occurs naturally in all living things. When it is not incorporated into a protein, “free glutamate” can readily bind to glutamate receptors in our taste buds to trigger the umami taste sensation [4]. Despite their different names, glutamate, glutamic acid, and monosodium glutamate are essentially the same molecule and behave the same way in our bodies.Glutamate

Since the original discovery of glutamate, scientists have identified additional molecules that contribute to the umami taste sensation. The nucleotides inosine 5ʹ-monophosphate (IMP) and guanosine 5ʹ -monophosphate (GMP) are responsible for the umami taste of bonito and shiitake mushrooms, respectively [5]. Because nucleotides make up our genetic material, molecules like IMP and GMP are ubiquitous in living organisms. Interestingly, IMP and GMP alone do not have strong umami flavor but can synergistically enhance the umami sensation of glutamate [4,6].

Practically all living things contain the umami molecules glutamate, GMP, and IMP. Proteins are built from amino acids like glutamate, whereas the genetic molecules DNA and RNA are made up of nucleotides like GMP and IMP. More specifically, GMP is an important component of RNA, including the “messenger RNA” (mRNA) that is transcribed from DNA and subsequently translated into proteins. IMP is not a typical component of mRNA, but is instead incorporated into other types of specialized RNA molecules like “transfer RNA” (tRNA). Free IMP can also be derived from the energy molecule ATP. Although all living things contain GMP and IMP, free GMP is found predominantly in mushrooms, while free IMP is found mainly in animal products [7].

Although glutamate is most notoriously used as a flavor-enhancing food additive in the form of MSG, many foods naturally contain high levels of free glutamate [7]. For example, a ripe tomato straight from the vine contains free glutamate levels similar to Worcester sauce [3,8]. Free IMP and GMP also occur naturally in many foods. Animal products like pork, chicken, and tuna are full of IMP, while GMP is most prevalent in mushrooms, yeasts, and plant-based foods [3,9].

Simple food processing techniques like fermentation, curing, and extraction can also increase natural levels of free glutamate, IMP, and GMP by breaking down proteins and genetic material [3,7]. During the production of soy sauce and many cheeses, the fermentation process breaks down soy or milk proteins, respectively, releasing many free glutamate molecules. Similarly, the cooking processes used to produce extracts like Marmite (yeast extract) break down proteins and genetic material to release free glutamate, IMP, and GMP.

This recipe, originally created by Adam Fleischman, capitalizes on the umami flavor of several common natural and processed ingredients to create one insanely tasty burger.

Approximate free glutamate content of Umami Burger ingredients. Approximate content of IMP and/or GMP is also reported for some ingredients. All values are reported as milligrams per 100 grams of the ingredient and are based on those reported in [3,7,8,10,11].

Adam Fleischman’s Umami Burger
Makes 4 burgers

Umami Ketchup
1 32-ounce can San Marzano tomatoes
1 medium onion, chopped
3 tablespoons olive oil
2 tablespoons tomato paste
½ cup packed dark brown sugar
½ cup cider vinegar
1 teaspoon salt

Purée the tomatoes with the juice from can in a blender until smooth. Cook the onion in oil in a heavy saucepan over moderate heat, stirring, until softened, about 8 minutes. Add the puréed tomatoes, tomato paste, brown sugar, vinegar, and salt and simmer, uncovered, stirring occasionally, until very thick, about 1 hour. Purée the ketchup in a blender until smooth. Chill, covered, overnight for flavors to develop.  Then add the umami seasonings to taste and chill the ketchup until needed.

Umami Seasonings
2 salted anchovies, cleaned
Tamari
Worcestershire sauce
Marmite
Truffle salt
Harissa

Combine the anchovies with the remaining ingredients to taste. Blend in a mortar and pestle or, for larger quantities in a blender or food processor. Set aside.

Oven-Dried Tomatoes
1 tablespoon brown sugar
1 tablespoon tomato paste
¾ teaspoon soy sauce powder
½ teaspoon Worcestershire sauce
2 pounds ripe tomatoes, sliced

Preheat the oven to its lowest temperature setting. Stir the brown sugar, tomato paste, soy sauce, and Worcestershire sauce together; brush on the sliced tomatoes. Put the tomatoes on a line sheet pan; dry in the oven overnight.

Caramelized Onions
2 pounds large onions
1 tablespoon unsalted butter
1 tablespoon vegetable oil
½ teaspoon table salt
2 star anise

Cut the onions in half from pole to pole; peel and slice across the grain to ¼-inch thickness. Heat the butter and oil in a 12-inch nonstick skillet over high heat; when the foam subsides, stir in the salt and star anise. Add the onions and stir to coat; cook, stirring occasionally, until the onions begin to soften and release some moisture, about 5 minutes. Reduce the heat to medium and cook, stirring frequently, until the onions are deeply browned and slightly sticky, about 40 minutes longer.

Parmesan Crisps
3 ounces Parmigiano-Reggiano

Preheat the oven to 375°F. Using the largest holes on a box grater, coarsely shred enough cheese to measure 1 cup. Line a large sheet pan with a nonstick liner, like Silpat. Arrange tablespoons of cheese 2 inches apart on the liner. Flatten each mound slightly with a spatula to form a 3-inch round. Bake in the middle of the oven until golden, about 10 minutes. Cool for 10 minutes on sheet on a rack; then carefully transfer each crisp with a metal spatula to a rack to cool completely.

To Assemble and Serve
1 ½ pounds assorted cuts of well-marbled beef (short rib, flap, skirt, brisket or hanger)
Vegetable oil
Salt and freshly ground black pepper
1 tablespoon butter
6 ounces shiitake mushrooms, stems removed
4 soft buns (potato or Portuguese), halved

Grind the beef coarsely in a meat grinder or food processor. Put 6 ounces of meat into a 4-inch ring mold and gently tap down to form into a patty. Heat a cast iron skillet on high for 5 minutes. When it’s very hot, pour in a drop of vegetable oil to lubricate the pan. Season the patties liberally with salt and pepper. Add the patties to the skillet and sear on one side for 3 minutes; flip once and sear for 2 more minutes for medium rare.

In another skillet, add half of the butter and sauté the mushroom caps for until soft, about 2 minutes. Set aside. Remove the beef patties to rest. Wipe the mushroom skillet and toast the buns cut side down with the remaining butter.

Remove the buns when toasted and add spread about 2 tablespoons of the umami ketchup on both halves of the bun. Stack a beef patty with 1 tablespoon of the caramelized onions, a parmesan crisp, 2 mushroom caps and 2 slices of oven dried tomato. Serve immediately.

Additional Resources

  1. Recipe adapted from Star Chefs
  2. “The Myth of MSG with Harold McGee” from Mind of a Chef
  3. Mosby, Ian. “‘That Won-Ton Soup Headache’: The Chinese Restaurant Syndrome, MSG and the Making of American Food, 1968-1980.” Soc Hist Med (2009) 22 (1): 133-151.

References Cited

  1. Ikeda K (2002) New Seasonings. Chemical Senses 27: 847–849. doi:10.1093/chemse/27.9.847.
  2. Nakamura E (2011) One Hundred Years since the Discovery of the “Umami” Taste from Seaweed Broth by Kikunae Ikeda, who Transcended his Time. Chemistry – An Asian Journal 6: 1659–1663. doi:10.1002/asia.201000899.
  3. Yamaguchi S, Ninomiya K (2000) Umami and food palatability. J Nutr 130: 921S–6S.
  4. Li X (2002) Human receptors for sweet and umami taste. Proceedings of the National Academy of Sciences 99: 4692–4696. doi:10.1073/pnas.072090199.
  5. Kurihara K (2009) Glutamate: from discovery as a food flavor to role as a basic taste (umami). Am J Clin Nutr 90: 719S–722S. doi:10.3945/ajcn.2009.27462D.
  6. Zhang F, Klebansky B, Fine RM, Xu H, Pronin A, et al. (2008) Molecular mechanism for the umami taste synergism. Proceedings of the National Academy of Sciences 105: 20930–20934. doi:10.1073/pnas.0810174106.
  7. Ninomiya K (1998) Natural occurrence. Food Reviews International 14: 177–211. doi:10.1080/87559129809541157.
  8. Rundlett KL, Armstrong DW (1994) Evaluation of freeD-glutamate in processed foods. Chirality 6: 277–282. doi:10.1002/chir.530060410.
  9. Maga J (1995) Flavor Potentiators. Food additive toxicology. New York: M. Dekker. pp. 379–412.
  10. Skurray GR, Pucar N (1988) l-glutamic acid content of fresh and processed foods. Food Chemistry 27: 177–180. doi:10.1016/0308-8146(88)90060-X.
  11. Populin T, Moret S, Truant S, Conte L (2007) A survey on the presence of free glutamic acid in foodstuffs, with and without added monosodium glutamate. Food Chemistry 104: 1712–1717. doi:10.1016/j.foodchem.2007.03.034. 

ProfileImageSmallAbout the author: Liz Roth-Johnson is a Ph.D. candidate in Molecular Biology at UCLA. If she’s not in the lab, you can usually find her experimenting in the kitchen.

Read more by Liz Roth-Johnson


Apple Pie with Peanut Butter Mousse

The Science of Pie – May 19, 2013
People’s Choice Award
Elan Kramer, Caleb Turner (Team “Insert Team Name Here”)

This student duo thought outside the box with this creative apple and peanut butter pie. To create the ultimate peanut butter experience, the team experimented with the effect of egg white content on the texture and density of the peanut butter mousse.

TeamInsertTeamNameHere

photos courtesy of Patrick Tran

Egg white content affects mousse texture. (A, B) Team “Insert Team Name Here” visualized the air bubbles incorporated into peanut butter mousses prepared with different amounts of egg whites. (C) Using image processing techniques, they calculated the mean (red) and median (blue) air bubble areas as a function of egg white content. Their results show that there is indeed an optimal egg white content for creating an light, airy mousse. (D) An egg white is made up of many proteins suspended in water. Whipping incorporates air bubbles into the egg whites, causing the proteins to unfold as they are exposed to air. Denatured proteins [link to ceviche recipe] form networks at the liquid/air interfaces that stabilize air bubbles within the egg white foam.

The Recipe
Frozen apple pie with peanut butter mousse

1 large store-bought graham cracker crust

For the apple layer:
2 tbsp unsalted butter
3 firm-textured cooking apples*, peeled, cored, and sliced
¼ cup granulated sugar
1 tsp fresh lemon juice
2 tbsp powdered sugar
*Team “Insert Team Name Here” used Pink Lady and Granny Smith apples

For the peanut butter mousse:
1 cup heavy cream
8 ounces cream cheese, softened
1 cup smooth peanut butter
¾ cup granulated sugar
½ cup firmly packed light brown sugar
2 tsp pure vanilla extract
2 large egg whites

For the topping:
1 cup heavy cream
1 tbsp powdered sugar
½ cup finely chopped salted dry-roasted peanuts
2 graham crackers, crushed
1 1/2 tsp cinnamon

To prepare the apple layer, melt the butter in a large sautée pan. Stir in the apples and granulated sugar and cook over medium heat, stirring often, until tender, about 5 minutes. Stir in the lemon juice and powdered sugar and cook, stirring, for 1 minute longer. Remove from the heat and refrigerate.

To make the peanut butter cloud layer, use an electric mixer to whip the heavy cream until it holds semi-firm peaks. Cover and refrigerate.

Using the mixer, beat the cream cheese and peanut butter together until smooth. Gradually beat in the sugars, then the vanilla. The mixture will be lumpy, like cookie dough. Add the whipped cream to the peanut butter mixture, slowly blending them together with the electric mixer until smooth.

Clean and dry the beaters. Using a clean bowl, beat the egg whites until they hold stiff peaks. Fold the whites into the peanut butter mixture with a rubber spatula until evenly blended. Put mixture into the pie crust, cover loosely with aluminum foil and freeze for at least 5 hours.

When you’re ready to serve the pie, take it out of the freezer and top with the refrigerated apples. For the topping, add the powdered sugar and 1/2 teaspoon to the cream and use an immersion blender or mixer to whip. Spread over the top of the pie and sprinkle with peanuts, graham cracker crumbs, and remaining cinnamon.

Recipe adapted from Cookstr: Frozen Apple and Peanut Butter Cloud Pie

Apple Pie with Vodka Crust

The Science of Pie – May 19, 2013
Judge’s Favorite Pie
Qiaoyi Wu, Qinqin Chen, Michelle Cheng (Team Aπ3)

Seeking to perfect pie crust texture, team Aπ3 experimented with different liquids that may impede the formation of gluten protein networks. Gluten gives structure and stability to pie dough, but can also make pie dough dense and tough when over-developed. The team examined the porousness, density, and browning of pie crusts prepared with their three different liquids compared to water and concluded that vodka creates the flakiest pie crust.

TeamApi3

photos courtesy of Patrick Tran

Different liquids affect the density of pie crust. (A) Pie crust prepared with alcohol (beer or vodka) is less dense than pie crust prepared with water. Interestingly, carbonated water also lowers the density of the pie crust compared to water. (B-E) Team Aπ3 did not observe much difference in the browning of pie crusts prepared with water (B), carbonated water (C), beer (D), or vodka (E).

The Recipe
Apple pie with vodka crust

For the crust:
1 1/4 cups all purpose flour
1/2 tbsp sugar
1/2 tsp salt
1/2 cup (1 stick) chilled unsalted butter, cut into 1-inch pieces
2 tbsp (approx.) ice water
2 tbsp (approx.) vodka

For the filling:
1/4 cup sugar
2 tbsp all purpose flour
1/4 tsp cinnamon
1 3/4 pounds apples, peeled, quartered, cored, thinly sliced*
*Team Aπ3 used a half Fuji and half Granny Smith apples.

For the streusel topping:
1/2 cup all purpose flour
1/2 cup firmly packed light brown sugar
1/4 tsp ground cinnamon
5 tbsp (2.5 oz) unsalted butter, chilled

Preheat oven to 375F.

To prepare the crust, mix the dry ingredients. Cut in the cubes of butter until the butter forms approximately pea-sized pieces. Add water and vodka one tablespoon at a time, alternating the liquids. Only add liquid until the dough starts to come together and can be formed into a ball. Chill dough for at least 30 min. Roll out the dough and press into a pie pan to form the bottom crust.

To prepare the filling, mix all filling ingredients. Spread the filling mixture on top of the bottom crust. Try to arrange the filling so that the top of the pie is flat.

To prepare the streusel topping, combine the flour, brown sugar, and cinnamon. Cut the butter into small pieces and incorporate into the dry ingredients until the butter is in very small pieces. Spread the streusel topping over the pie filling.

Bake pie at 375F for 45-50 min.

Recipe adapted from Eat Me, Delicious: Apple Pie with Brown Sugar Streusel Topping