Tag Archive for: candy

Space Candy & 3D-printed Candy

candy corn in space

In space, NASA astronaut Don Pettit uses candy corn for a zero-gravity candy corn demonstration that illustrates how surfactant molecules behave. In Germany, Café Gruen Ohr offers customers the chance to customize their own candy using a 3D printer.
Read more

Cotton Candy

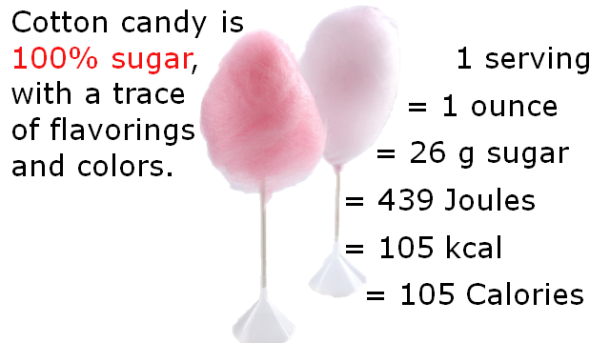
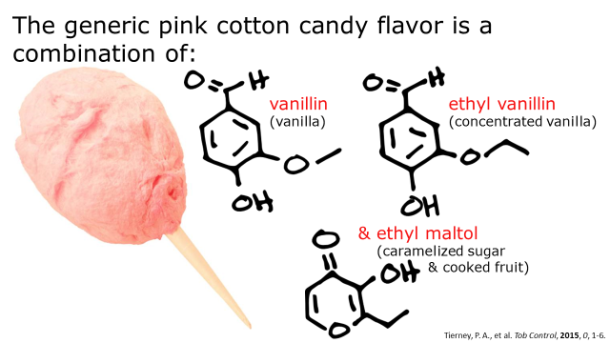
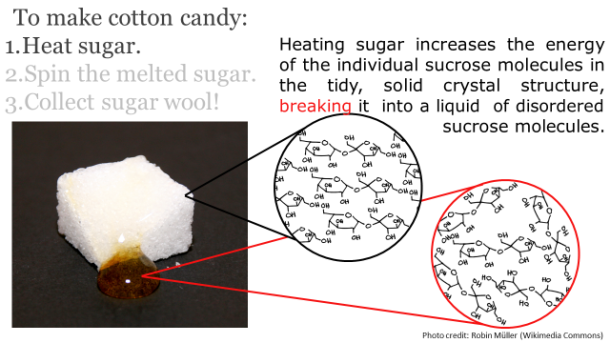
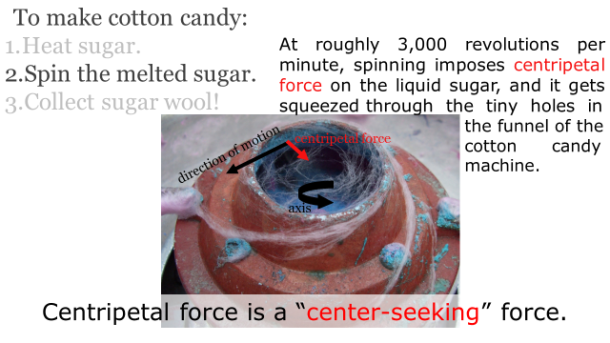
Summer would be incomplete without carnivals and bright, fleecy, sugary cotton candy. For a snack that’s nothing but sugar and air, there’s a surprising amount of physics and chemistry involved. Below are seven science-heavy facts about this feathery-light confection.

Fotm, cotton candy slide 1


Fotm, cotton candy slide 2


Fotm, cotton candy slide 3


Fotm, cotton candy slide 4


Fotm, cotton candy slide 5


Fotm, cotton candy slide 6


Fotm, cotton candy slide 7


Editor’s note: The original post stated that 1 ounce of cotton candy is 0.105 kilocalories, when in fact, it is 105 kilocalories, which is equivalent to 105 Calories. Thanks to our astute reader, Allison of the Internet for catching that! The post has now been updated (08-18-2015 10:06 p.m. PST)


Alice PhungAbout the author: Alice Phung once had her sights set on an English degree, but eventually switched over to chemistry and hasn’t looked back since.

Read more by Alice Phung


Flavor-Changing Chewing Gum

Growing up as a chubby kid who tried to convince her parents that candy belonged at every meal (a real life Augustus Gloop, if I may), one of my favorite books was Charlie and the Chocolate Factory. And though I’d dream for a mug of the chocolate river, my favorite of Willy Wonka’s creations was the three-course chewing gum. Tomato soup, roast beef, and blueberry pie in one piece of gum? The possibilities! While you can find some commercial versions of flavor-changing gum at the supermarket today, my fingers are crossed for a three-course meal sometime in the near future.

Image Credit: (stevendepolo/flickr)

Image Credit: (stevendepolo/flickr)

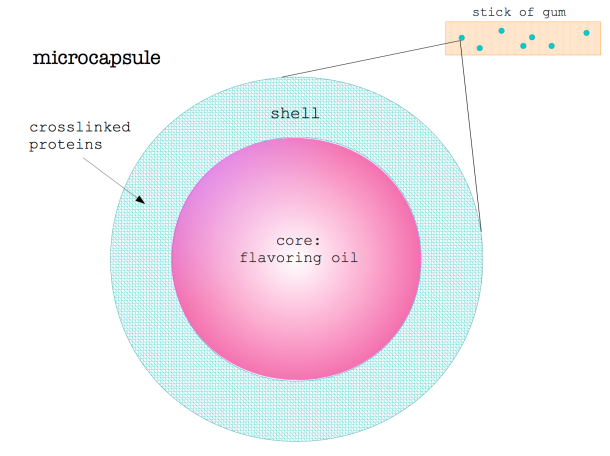
To get any sort of flavor in a chewing gum in the first place, a process called microencapsulation is used, in which a core of tiny flavor particles is surrounded by a shell coating to produce minuscule spherical capsules – we’re talking diameters of roughly a couple hundred micrometers in size [1]. Chewing gums contain these little flavor microcapsules; the core of each microcapsule is usually some sort of liquid flavoring, and the shell is made of crosslinked proteins which stabilize the core material, isolate the core from the chewing gum base, and will break apart in response to the shear forces of chewing to release the core flavoring [1].

So let’s say you have a stick of strawberry-flavored chewing gum. The gum will be studded and mixed with microcapsules filled with strawberry flavoring oils; those are the beady dots you sometimes see on the chewing gum surface. The fruity flavor is released once you chew on the gum and break open the shells of the strawberry capsules to release the flavoring oils in your mouth.

microencapsulated flavor droplet

While there are various methods for flavor encapsulation, the technique which is used to make the capsules in chewing gum is the chemical process called complex coacervation. [4] This process involves an aqueous solution with two or more oppositely charged polymers – one with positive charge (such as gelatin or agar), and another with negative charge (such as carboxymethylcellulose or gum arabic) [2]. These two polymers are diluted into water and then controlled for both pH and temperature, so that when an oily substance (such as a flavoring oil) is mixed into the solution, the molecules form a chemically crosslinked, shell-like film around each of the oil particles, resulting in the encapsulated flavor beads present in chewing gum!

The coacervation solution then separates into two liquid phases – one called a “coacervate” that contains the many tiny oily droplets that contain the polymers and the other is called the “equilibrium liquid”, which serves as the solvent. Once the shells around the oil droplets are formed, the rest of the solution is washed out and the entire capsules are dried so that they can be incorporated into the chewing gum base [3].

coacervation_graphic

The Coacervation Process: (a) The oily flavor droplets float around in an emulsion of the shell polymer solution, (b) The coacervation solution separates into the coacvervate and the solvent (c) The coacervate surrounds the outside of the flavor core, (d) And forms a continuous crosslinked polymer shell around the core.

So how does the flavor-changing gum work? The secret lies in the fact that the tiny flavor capsules in a chewing gum can be engineered to release at different times. By creating microcapsules with different dissolution times, the release of several different flavor capsules can be staggered to make a chewing gum that “changes flavors”. The first flavor composition in a flavor-changing gum is usually the unencapsulated liquid flavor or a starch sugar coating on the surface of the gum, so that the first flavor can be released on contact with saliva [4].

After the initial flavor perception, the second, third, fourth, and any subsequent flavors will be encapsulated, but with varying materials in the cores and shells, so that each flavor is released at a different time during the gum-chewing experience. The goal for a flavor-changing chewing gum is to have its flavors release quickly and intensely, preferably 15 to 45 seconds after the release of the previous flavor [5]. The release times of the microcapsules can depend on a variety of factors involving both the core flavoring substance and the encapsulating materials:

  • Solubility of Flavoring Substance
    Water-soluble flavoring substances are more soluble in our saliva, so they are released in chewing gum before the oil-soluble flavoring substances. Water-soluble flavors include vanilla, synthetic fruit flavors like cherry and lemon, and plant extracts such as coffee and licorice. Oil-soluble flavors include cinnamon oil, peppermint oil, peanut butter flavor, chocolate, and eucalyptus oil [5].

  • Hydrophobicity of Capsule Shell
    Microcapsule shells made of highly hydrophobic proteins, meaning they have low water-absorption properties, take longer to release the core flavor. Meanwhile, shells that are made with less hydrophobic material, which can absorb more water, release the flavor components earlier and more quickly. For example, if we use ethylene-vinyl acetate as the shell material, the release rate can be controlled with a few adjustments. A higher ratio of ethylene to vinyl acetate creates a more hydrophobic shell, which results in a slower release of flavor. On the other hand, using lower ratio of ethylene would create a less hydrophobic shell and a quicker release of flavors [5].

  • Tensile Strength in Microcapsules
    The maximum amount of stress that the encapsulation shell can withstand from chewing before it breaks and releases the core flavor is called the tensile strength. Changing the tensile strength of each flavor’s shell can determine the order in which the flavors are perceived. Materials that lower the shell’s tensile strength are fats, plasticizers, waxes, and emulsifiers, so adding these materials into the shell of a flavor capsule causes it to break more easily and release flavors more quickly [5]. Meanwhile polymers with high molecular weight tend to increase the tensile strength of the shell, so these flavors are released later, since they require more vigorous chewing.

A combination of these factors from hydrophobicity to tensile strength can be used to determine the order of the flavors released for an entire three-course meal (or more!) in just a stick of gum. Tomato soup, roast beef, and blueberry pie, here I come!

Image Credit: (pinkiepielover63/deviantart)

Image Credit: (pinkiepielover63/deviantart)

References Cited:

  1. J. Sris, A. Seethadevi, K. Suria Prabha, P. Muthuprasanna, and P. Pavitra. (2012). Microencapsulation: a review. International Journal of Pharma and Bio Sciences. 3: 509–521.
  2. Feng T., Xiao Z., Tian H. (2009). Recent Patents in Flavor Microencapsulation. Recent Patents on Food, Nutrition, & Agriculture. 1:193–202.
  3. Xiao Z., Liu W., Zhu G., Zhou R., Niu Y. (2014). A review of the preparation and application of flavour and essential oils microcapsules based on complex coacervation technology. Journal of the Science of Food and Agriculture. 94: 1482-1494.
  4. Gaonkar A.G., Vasisht N., Khare A.R., Sobel R. (2014). Microencapsultion in the Food Industry: A Practical Implementation Guide. Academic Press. 421-453.
  5. Lenzi S., Kar S., Michaelidou T.A., and Harvey J.E. (2012). Chewing Gum Compositions Providing Flavor Release Profiles. Kraft Foods Global Brands LLC, assignee. Patent WO2012034012.

Eunice LiuAbout the author: Eunice Liu is studying Linguistics at UCLA. She attributes her love of food science to an obsession with watching bread rise in the oven.

Read more by Eunice Liu


Homemade Marshmallows

Photo Credit: Heather Katsoulis (hlkljgk/Flickr)

Photo Credit: Heather Katsoulis (hlkljgk/Flickr)

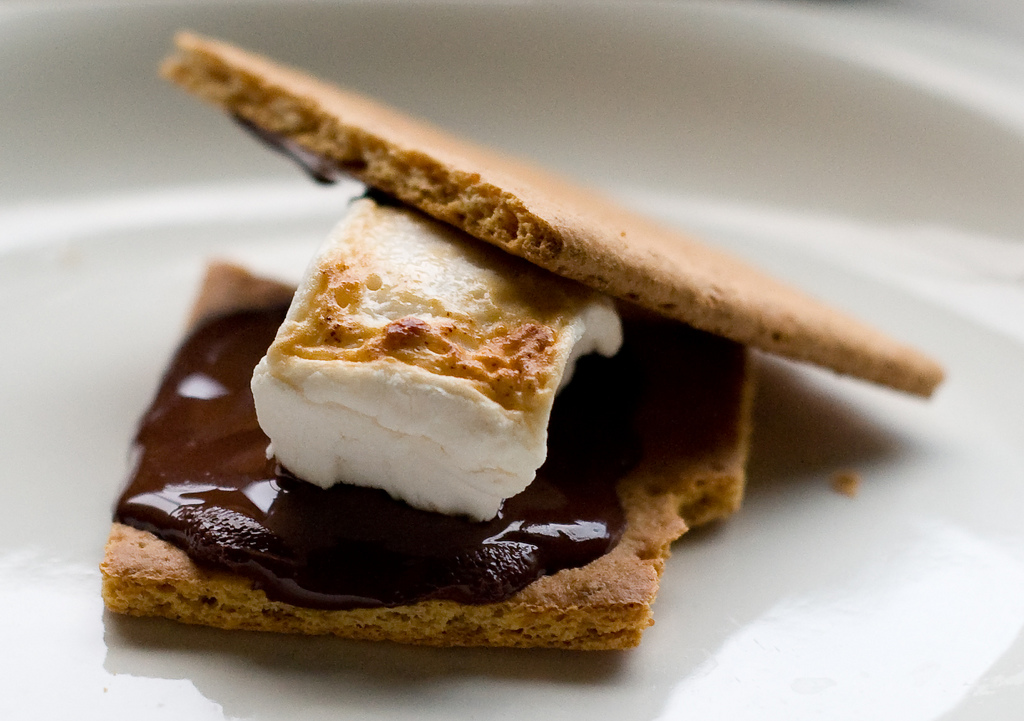
Whether you prefer them toasted over a campfire, bobbing in a cup of hot chocolate, or roasted over a bed of sweet potatoes, marshmallows are an ooey-gooey fluffy treat that just finds a way warm the cockles of your heart.

Marshmallows, like other well-known aerated confections – think mousses, ice cream, meringues –  are essentially made of four basic components: sugar, water, air, and a hydrocolloid.  Hydrocolloids, often called “food gums” are polysaccharides, or typically large-branching proteins, that form thick gels when they interact with water. [1]

Their ability to bind to water molecules makes them hydrophilic (or “water-loving”), and their ability to remain suspended and dispersed evenly in the water (without settling to the bottom) makes the substance a colloid. Thus, food gums are hydrophilic colloids, or hydrocolloids.

Photo Credit:  Daniel Campagna (Chefpedia)

Photo Credit: Daniel Campagna (Chefpedia)

Hydrocolloids are added to many foods we eat – as thickening agents in pie fillings or gravies, gelling agents in puddings and jams, foam stabilizers in beer and meringues, film formers in sausage casings, emulsifiers in salad dressing, and even fat replacers in frostings and muffins.  Common examples of hydrocolloids are starch, xanthan gum, locust bean gum, alginate, pectin, carrageenan, and agar, which all influence the texture and mechanical stability of many foods.  [1][2]

In marshmallows, the hydrocolloid responsible for the chewy, bouncy texture we know and love is gelatin. While gelatin is one of the most popular commercial hydrocolloids, it is definitely not the most glamorous.  Gelatin is made of collagen, which is the structural protein derived from animal skin, connective tissue, and bones. In fact, mainstream gelatin is usually obtained from pigskin, cattle bones, and cattle hide. [3] Gelatin is unique because not only does it function as a foam stabilizer for the marshmallows [4], but when it is mixed with water, gelatin forms a thermally-reversible gel.  These gelatin gels have a melting temperature just below body temperature (< 35°C or 95 °F), so the gel product literally melts in your mouth and releases intense flavor immediately as it dissolves, which is a difficult quality to replicate with other hydrocolloids. [3]  

Gelatin makes marshmallows chewy by forming a tangled 3-D network of polymer chains.  Once gelatin is dissolved in warm water (dubbed the “blooming stage”), it forms a dispersion, which results in a cross-linking of its helix-shaped chains.  The linkages in the gelatin protein network, called “junction zones” trap air in the marshmallow mixture and immobilize the water molecules in the network . The result? The famously spongy structure of marshmallows! [1]  This is why the omission of gelatin from a homemade marshmallow recipe will result in marshmallow crème, since there is no gelatin network to trap the water and air bubbles.

And for the gelatin-averse, worry not! There are indeed many hydrocolloid alternatives to gelatin. However, since gelatin has so many different functions (gelling agent, emulsifier, stabilizer, thickener, etc.), its alternatives are not universal. Rather, substitutes are specific to each specific food application. In our case, some have suggested pectin – a polysaccharide from the cell walls of plants – as the ideal replacement for gelatin in marshmallows [1].
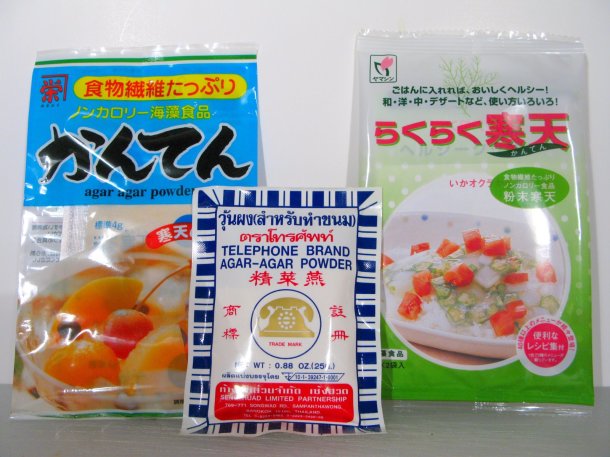
Agar agar is a commonly used vegetarian alternative for jellies.  Photo Credit: I Believe I Can Fry (johnnystiletto/Flickr)

Agar agar is a commonly used vegetarian alternative for jellies.
Photo Credit: I Believe I Can Fry (johnnystiletto/Flickr)

Pectin, carrageenan (a polysaccharide from red seaweeds), or combinations of both can replicate the elastic texture and intense flavor release that gelatin provides for marshmallows. However, since the melting points of both pectin and carrageenan are not the same as the melting point of gelatin – which, as you recall, is slightly below body temperature, marshmallows made with pectin or carrageenan don’t have the quite the same “melt-in-your-mouth” sensation. [1]

* Note: Carrageenan gels are unique in that their melting temperature can be modified, depending on the solution concentration of the carrageenan and the presence of cations, so the melting temperature ranges from 40°C (104°F) and 70°C (158°F).

* Note: Carrageenan gels are unique in that their melting temperature can be modified, depending on the solution concentration of the carrageenan and the presence of cations, so its melting temperature ranges from 40°C (104°F) and 70°C (158°F).

As you can see, none of the gelatin alternatives have the appropriate melting temperatures to replicate gelatin’s melt-in-your-mouth sensation. However, this does prove advantageous in the fact that they can last longer on hot days or in hot, tropical climates and they do not require refrigeration to set.

No matter what you prefer for as a hydrocolloid, pillowy marshmallows can made with the same basic recipe:

Photo Credit: Joy (joyosity/Flickr)

Photo Credit: Joy (joyosity/Flickr)

Ingredients

For the bloom:
3 tablespoons (typically 3 packets) unflavored gelatin powder
1/2 cup cold water

*Vegan Substitution: 2 ½ tablespoons agar agar + ½ cup and 2 tablespoons water
Alternatively, this vegan marshmallow recipe is worth checking out:

For the marshmallows:
3/4 cup water
1 1/2 cups granulated sugar
1 1/4 cup sugar cane syrup or corn syrup
Pinch of salt

For the marshmallow coating:
1 1/2 cups powdered sugar
1/2 cup cornstarch
non-stick cooking spray


Equipment
Bowls and measuring cups
Fork or small whisk
9×13 baking pan or other flat container
4-quart saucepan (slightly larger or smaller is ok)
Pastry brush (optional)
Candy thermometer
Stand mixer with a wire whisk attachment
Stiff spatula or spoon (as opposed to a rubbery, flexible one)
Sharp knife or pizza wheel

Instructions

  1. Prepare pans and equipment: Spray the baking pan with cooking spray. Use a paper towel to wipe the pan and make sure there’s a thin film on every surface, corner, and side. Set it near your stand mixer, along with the kitchen towel and spatula. Fit the stand mixer with the whisk attachment.
  2. Bloom the gelatin/agar: Measure the gelatin or agar into the bowl of the stand mixer. Combine 1/2 cup cold water in a measuring cup and pour this over the gelatin or agar while whisking gently with a fork. Continue stirring until the gelatin or agar has dissolved or reached the consistency of apple sauce and there are no more large lumps. Set the bowl back in your standing mixer. (Alternatively, you can bloom the gelatin or agar in a small cup and transfer it to the stand mixer.)
    * NOTE: You can add about 1 tablespoon of powdered flavorings to your hydrocolloid while it is blooming in the water.
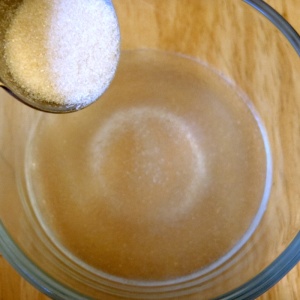
    Photo Credit: Joy (joyosity/Flickr)

    Photo Credit: Joy (joyosity/Flickr)

  3. Combine the ingredients for the syrup: Pour 3/4 cup water into the 4-quart saucepan. Pour the sugar, corn syrup, and salt on top. Do not stir.
  4. Bring the sugar syrup to a boil: Place the pan over medium-high heat and bring it to a full, rapid boil — all of the liquid should be boiling. As it is coming to a bowl, occasionally dip a pastry brush in water and brush down the sides of the pot. This prevents sugar crystals from falling into the liquid, which can cause the syrup to crystallize. If you don’t have a pastry brush, cover the pan for 2 minutes once the mixture is at a boil so the steam can wash the sides.
    Do not stir the sugar once it has come to a boil or it may crystallize!
  5. Boil the syrup to 247°F to 250°F: Clip a candy thermometer to the side of the sauce pan and continue boiling until the sugar mixture reaches 247°F to 250°F. Take the pan off the heat and remove the thermometer.
  6. Whisk the hot syrup into the gelatin / agar: Turn on your mixer to medium speed. Carefully pour the hot sugar syrup down the side of the bowl into the gelatin or agar. The mixture may foam up — just go slowly and carefully.
  7. Increase speed and continue beating: When all the syrup has been added, cover the bowl with a clean kitchen towel and increase the speed to high (the cloth protects from splatters — the cloth can be removed after the marshmallows have started to thicken).

    Photo Credit: Joy (joyosity/Flickr)

    Photo Credit: Joy (joyosity/Flickr)

  8. Beat marshmallows until thick and glossy: Whip for about 10 minutes. At first, the liquid will be very clear and frothy. Around 3 minutes, the liquid will start looking opaque, white, and creamy, and the bowl will be very warm to the touch. Around 5 minutes, the marshmallow will start to increase in volume. You’ll see thin, sticky strands between the whisk and the side of the bowl; these strands will start to thicken into ropes over the next 5 minutes. The marshmallow may not change visually in the last few minutes, but continue beating for the full 10 minutes. When you finish beating and stop the mixer, it will resemble soft-serve vanilla ice cream.
    * NOTE: Add 1- 2 tablespoons of liquid flavorings during the last couple minutes of the beating process. (See Ideas Section below.)
  9. Immediately transfer to the baking pan: With the mixer running on medium, slowly lift (or lower, depending on your model) the whisk out of the bowl so it spins off as much marshmallow as possible. Using your stiff spatula, scrape the as much of the thick and sticky marshmallow mixture into the pan as you can.
    * NOTE: If you want mini marshmallows, after mixing, immediately put the mixture in a piping bag and pipe out your mini marshmallows in the size and shape of your choice.
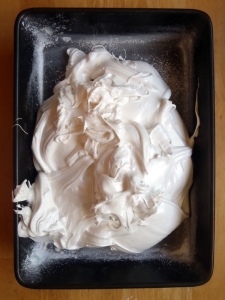
    Photo Credit: Joy (joyosity/Flickr)

    Photo Credit: Joy (joyosity/Flickr)

  10. Let the marshmallows set for 6 to 24 hours: Spray your hands lightly with cooking oil and smooth the top of the marshmallow to make it as even as possible. Let the mixture sit uncovered and at room temperature for 6 to 24 hours to set.
  11. Prepare the marshmallow coating: Combine the powdered sugar and cornstarch in a bowl.
  12. Remove the marshmallows from the pan: Sprinkle the top of the cured marshmallows with some of the powdered sugar mix and smooth it with your hand. Flip the block of marshmallows out onto your work surface. Use a spatula to pry them out of the pan if necessary. Sprinkle more powdered sugar mixture over the top of the marshmallow block.
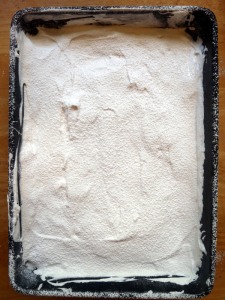
    Photo Credit: Joy (joyosity/Flickr)

    Photo Credit: Joy (joyosity/Flickr)

  13. Cut the marshmallows: Using a sharp knife or pizza wheel, cut the marshmallows into squares. It helps to dip your knife in water every few cuts. (You can also cut the marshmallows with cookie cutters.)
  14. Coat each square with powdered sugar mix: Toss each square in the powdered sugar mix so all the sides are evenly coated.

    Photo Credit: Joy (joyosity/Flickr)

    Photo Credit: Joy (joyosity/Flickr)

  15. Store the marshmallows: Marshmallows will keep in an airtight container at room temperature for several weeks. Leftover marshmallow coating can be stored in a sealed container indefinitely.

Ideas:

  • Add Flavorings: You can add about a tablespoon of either powdered or liquid flavorings/food colorings to the marshmallows at Step 2 or Step 8, respectively, in the recipe.
  • Sweet Marshmallows
    – classic: vanilla extract, almond extract, cocoa powder
    – floral: rose water, orange blossom water
    – spiced: cinnamon, pumpkin spice, cardamom, nutmeg, chai tea, peppermint
    – fruity: passion fruit, strawberry, mango, lemon juices
  • Savory Marshmallows
    –  A great base for savory marshmallows: PopSci:Sechuan Peppercorn Marshmallow
    – garlic salt and pepper
    – pesto (I’m imagining a pillowy caramelized pesto-marshmallow roasted on top of a pizza!)
    – hot sauce
  • Add citric acid or cream of tartar to stabilize the inverted sugars in your recipe and prevent them from crystallizing, essentially ensuring that your marshmallows remain fluffy and chewy.
  • Add your sugar syrup into whipped egg whites to incorporate extra air volume and structure for spongier, pillowy marshmallows.
  • DIY Lucky Charms: You can make your own dehydrated marshmallows, similar to the ones found in breakfast cereals (but without all the suspicious additives) by evaporating the water from the sugar solution in your homemade marshmallows.  Various methods are described here.


Recipe adapted from

References Cited

    1. Saha, D., Bhattacharya, S. Hydrocolloids as thickening and gelling agents in food: a critical review. Journal of Food Science and Technology. December 2010; 47(6): 587-597.
    2. Gum“. Food @ OSU.
    3. Karim, A. A., Bhat, R. Gelatin alternatives for the food inudustry: recent developments, challenges and prospects. Trends in Food Science & Technology. December 2008; 19(12): 644-656.
    4. Gelatin. Gelatin Food Science. 14 Dec. 1998.

Eunice LiuAbout the author: Eunice Liu is studying Neuroscience and Linguistics at UCLA. She attributes her love of food science to an obsession with watching bread rise in the oven.

Read more by Eunice Liu


Insect Farmers & Kitchen Scientists

Insect farming

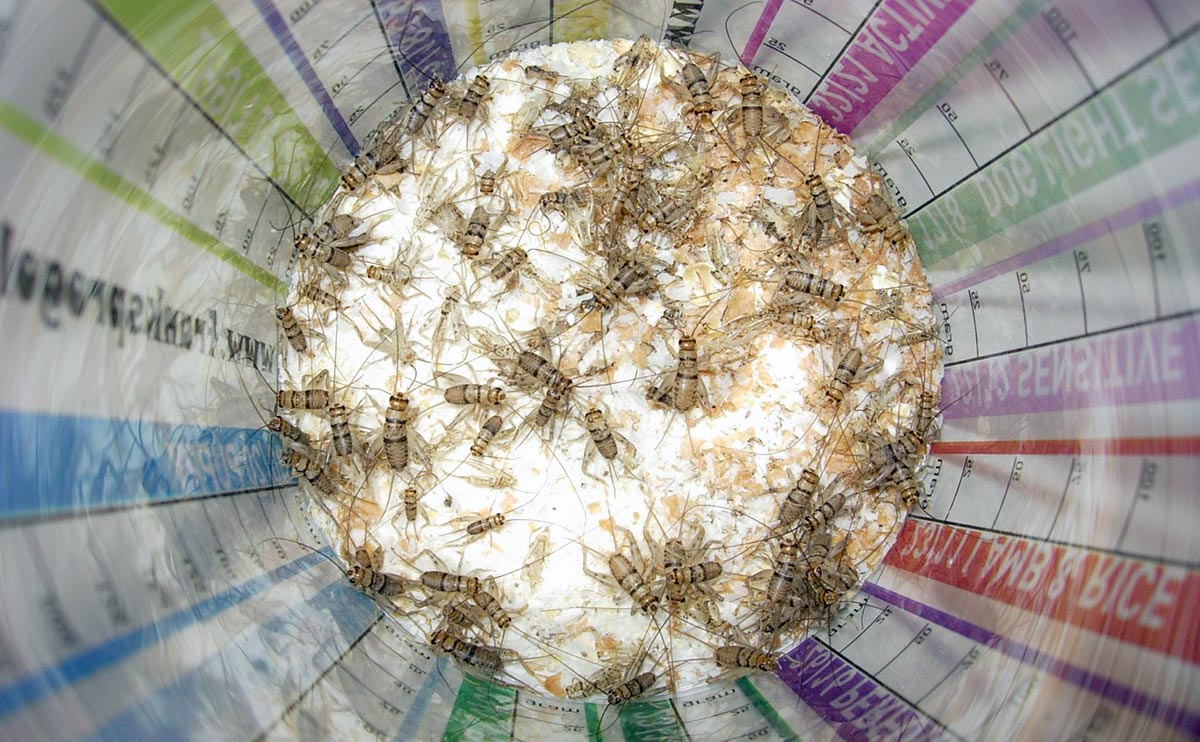
Larry Peterman of Hotlix insect-containing candies gives insight into insect farming, and Guy Crosby of Cooks Illustrated helps shed a scientific light on the mysteries of the kitchen.
Read more

Sugar Chemistry of Hard Candies

Photo Credit: Adam Zivner (Wikimedia Commons)

Photo Credit: Adam Zivner (Wikimedia Commons)

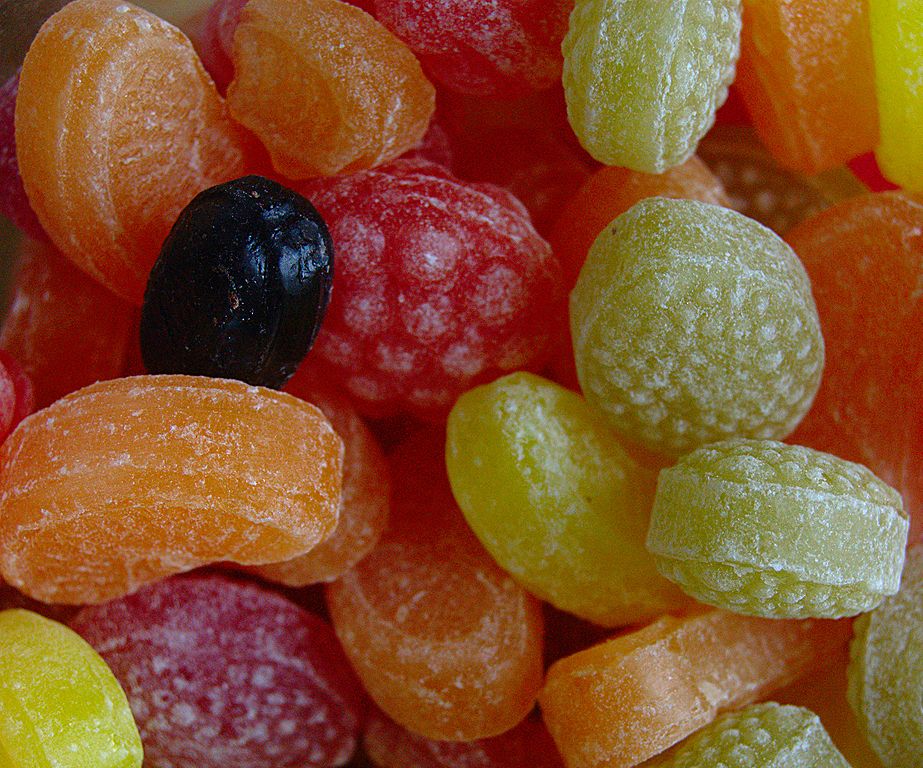
Old-fashioned candy-making is a fascinating spectacle, if one ever gets the opportunity to watch. Fortunately, the Internet is full of videos like this one, which shows how hard candies (specifically, candy canes) are made by hand:

The process that turns ordinary, granulated table sugar into solid, glassy, hard candy is as dynamic on a molecular level as it is captivating to watch on an observable scale.

As a dry ingredient, table sugar comprises granules of sucrose crystals. Transforming these granules into a solid piece of candy begins by dissolving sugar—lots of sugar—in water. When stirred into water, the granules break apart into individual sucrose molecules. Hard candy recipes typically call for 2.5–4 parts sugar in 1 part water. However, sucrose has a solubility of only 2000 g/L, which is roughly 2 cups sugar in 1 cup room temperature water [1]. This is easily remedied by turning up the heat; sucrose solubility increases with temperature, meaning much more sugar can be dissolved in hot water compared to cold or room temperature water.

Boiling a mixture of sugar and water does more than simply allow larger volumes of sucrose to dissolve in water. As the temperature of the sugar solution rises, water evaporates and leaves behind the sugar in its molten form. This creates a very concentrated sugar solution. Different sugar concentrations correspond to different types of candies (Table 1). In the case of hard candy, confectioners and professional candy-makers typically bring the boiling sugar solution to about 150°C (302°F) before removing it from the heat.

Table 1: Stages of Sugar Cooking (Adapted from Crafty Baking.)

Stage Temp (°C/°F) Sugar conc. Candy examples
Thread 110-112/230-234 80% Sugar syrup, fruit liqueur
Soft ball 112-116/234-241 85% Fudge, pralines
Firm ball 118-120/244-248 87% Caramel candies
Hard ball 121-130/250-266 90% Nougat, toffee, rock candy
Soft crack 132-143/270-289 95% Taffy, butterscotch
Hard crack 146-154/295-309 99% Brittles, hard candy/lollipop
Clear liquid 160/320 100%
Brown liquid 170/338 100% Liquid caramel
Burnt sugar 177/351 100% Oops…

At this point, the sucrose has been concentrated to such a degree that it is considered supersaturated. Supersaturated solutions are unstable, in the sense that any type of agitation, such as stirring or bumping, will trigger sugar crystallization: sucrose molecules will transition out of the molten liquid solution into a crystalline, solid state [2]. Think of sucrose molecules as Legos; crystallization is the process of these molecules locking together into a solid structure. It may not seem like it, but crystallization is a big no-no in hard candies.

In broad terms, candies are categorized as crystalline or non-crystalline. Crystalline candies, such as fondants, fudges, and marshmallows, are soft, pliable, and creamy thanks to their sucrose crystal structures. Conversely, non-crystalline candies are firmer and include toffees, caramel candies, brittles, and hard candies. Unwanted crystals in these candies create a grainy, even gritty, candy texture. Hindering the crystallization process is crucial for making a successful batch of hard candies.

This is where corn syrup, another key candy ingredient, plays an important role. Corn syrup consists primarily of starch, which is nothing more than a string of sugar (glucose) molecules linked together. When heated, the starch breaks apart into its glucose components. These glucose molecules are smaller than sucrose and can impair crystallization by coming between the sucrose molecules, ultimately interfering with crystal formation [2]. In some recipes, invert sugar or honey may be added in lieu of corn syrup. Invert sugar and honey are both mixtures of glucose and fructose, which impede sucrose crystallization the same way as corn syrup.

During the final stages of candy-making, the sugar solution is poured onto a cooling table. As it cools, it takes on a more solid, plastic-like mass that is still very pliable. Flavors and dyes are added at this stage. Sometimes an acid, such as citric acid, is also added. These acids further prevent sucrose crystallization by hydrolyzing sucrose molecules into their basic components: glucose and fructose. The sugary mass is then aerated, often by rolling, pulling, or folding, so that it cools down quickly and becomes more solid. This is the creative stage in which the candy-maker kneads, rolls, molds, and cuts the candy into its final shape.

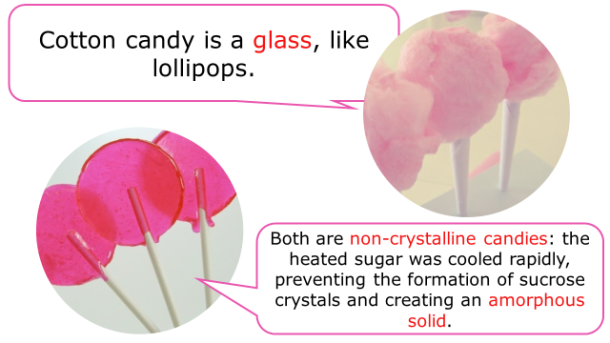
Hard candy is ready to eat once it cools down to and hardens at room temperature. At its completed stage, hard candy is similar to glass: it’s an amorphous solid that is shiny, rigid yet fragile, and sometimes transparent.

Who knew such simple, little candies could be so complex?

References cited

  1. Sucrose, International Chemical Safety Card 1507, Geneva: International Programme on Chemical Safety, November 2003.
  2. Ouiazzane, S., Messnaoui, B., Abderafi, S., Wouters, J., Bounahmidi, T. Modeling of sucrose crystallization kinetics: The influence of glucose and fructose. Journal of Crystal Growth, 2008; 310: 3498–3503.

Alice PhungAbout the author: Alice Phung once had her sights set on an English degree, but eventually switched over to chemistry and hasn’t looked back since.

Read more by Alice Phung


Deconstructing Twinkies & Sonicating Gummi Bears

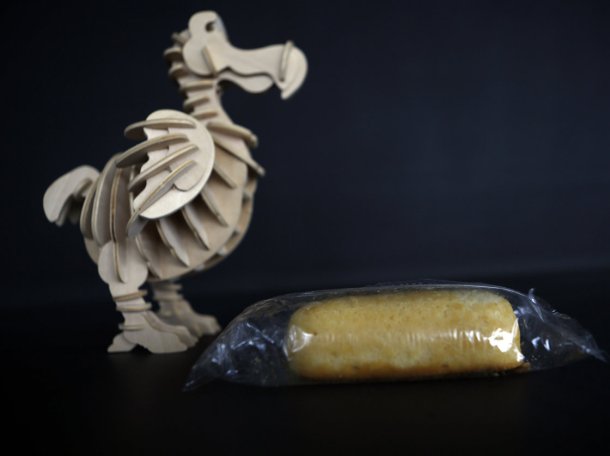
Dodo twinkies

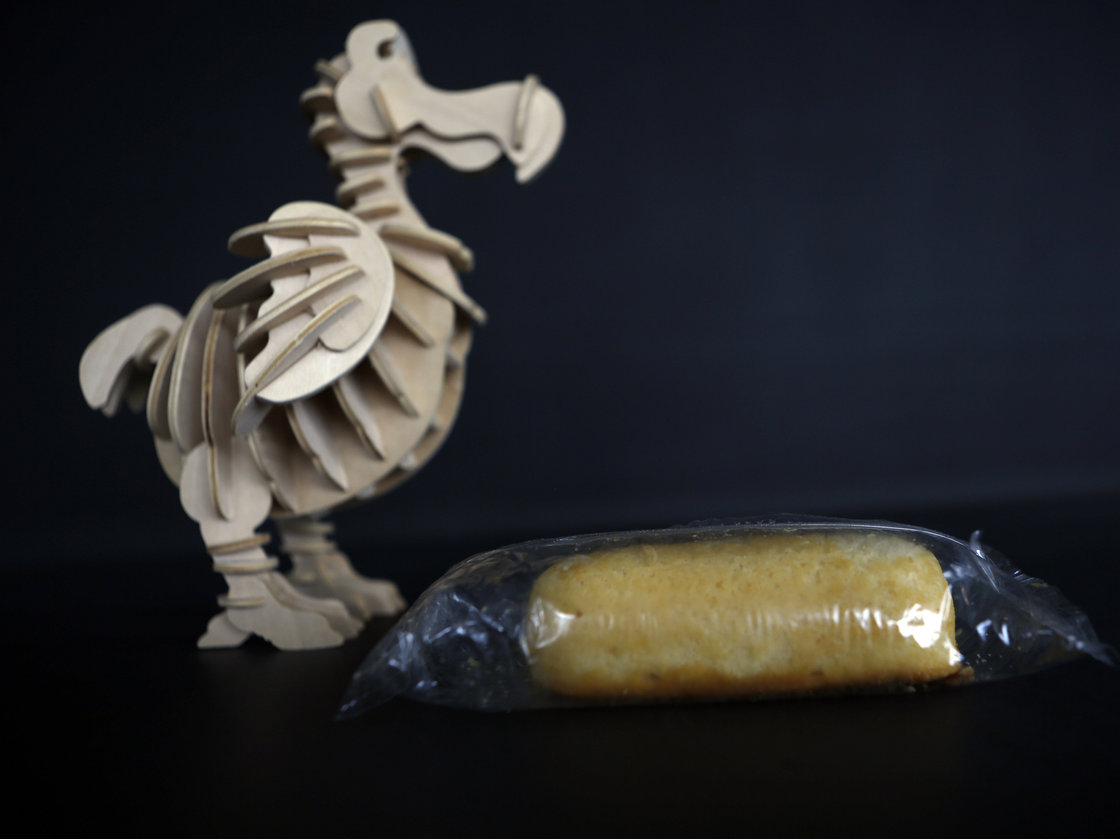
The Twinkies ingredients list is analyzed to figure out how these snacks have such a long shelf life (45 days!), while in lab, gummi bears are subjected to sonication, liquid nitrogen, and trypsin.
Read more

Pop Rocks and Carbonation

Photo Credit: Jamie (jamiesrabbits/Flickr)

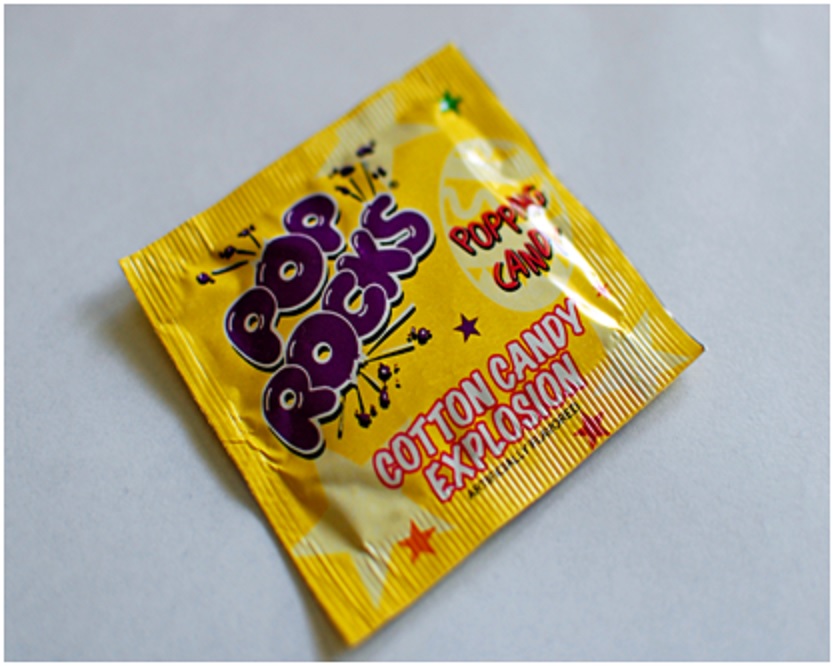
Some might say one of life’s little pleasures is eating candy.  Those who have tried Pop Rocks, however, know that its sugary glory and dare-devilish allure warrant an entirely new adventure.  Although it appears harmless, a handful of Pop Rocks candy will set off a fizzy explosion of sugar crystals and popping noises in your mouth.  But no remorse is needed; Pop Rocks aren’t actually dangerous. (Mythbusters proves your stomach won’t explode.)

How are Pop Rocks made?

Pop Rocks were developed by scientist William A. Mitchell in 1956 with a technique patented in 1961 to create a revolutionary confection which “enclos[es] a gas within a solid matrix” [1, 2].  Essentially, Pop Rocks is made of a typical hard candy sugar solution (sucrose, lactose, corn syrup and flavoring) with the addition of one important ingredient: highly-pressurized carbon dioxide (CO2).

First, the sugar solution is heated and melted to obtain a “fusible sugar”. Pop Rocks, like most other hard candies, uses a sugar solution of sucrose, lactose, and corn syrup, because these ingredients produce candy with low hygroscopicity – which means the candy is less likely to absorb water from the surrounding atmosphere [2]. This ensures that the sweet morsels do not dissolve as easily in a humid environment; they are also less sticky and have a longer shelf life.

Just as CO2 transforms syrupy juice into soda, it will turn ordinary candy into Pop Rocks!  The way this works: CO2 at 600 pounds per square inch (psi) is mixed with the melted sugar until there is about 0.5 to 15 ml of gas per gram of sugar [1, 2].  Note that 600 psi is roughly 7 times greater than the pressure inside a champagne bottle, 20 times greater the pressure in your car tires, and 40 times greater than normal atmospheric pressure at sea level [5, 6].

Photo Credit: Wikipedia

Photo Credit: Spiff (Wikimedia Commons)

Once the CO2 is thoroughly incorporated, a process which takes anywhere from 2-6 minutes [2], the mixture is cooled and the candy hardens. Cooling is done as rapidly as possible to prevent CO2 from diffusing out of the candy, reduce hygroscopicity, and minimize crystallization, a process which makes the candy very fragile. [2]  This causes the Pop Rocks to shatter and gives the candy’s signature appearance, “mini rocks” of sugar crystals.

The result?  Small candy pieces encapsulating bubbles of high-pressure CO2. Lo, the magic of carbonation!

Photo Credit: Wikipedia

Photo Credit: Evan Amos (Wikimedia Commons)

So why do Pop Rocks pop?

When you eat Pop Rocks, the moisture and temperature in your mouth melts the candy.  The subsequent popping sounds are a result of the high-pressure CO2 bubbles being released into atmospheric pressure! But what about the crackling sensations felt in your mouth?  Why do we perceive carbonation as a fizzy, tingling flavor sensation?

In the past few years, scientists have identified that taste receptor cells can actually detect and respond to carbonation.  Specifically, sour-sensing taste receptor cells are activated in response to CO2 and are responsible for the “taste of carbonation” [3].

Photo Credit: Bart Heird (chicagobart/Flickr)

Photo Credit: Bart Heird (chicagobart/Flickr)

The Taste of Carbonation

Sour-sensing taste receptors specifically express a gene which encodes carbonic anhydrase 4, which is an enzyme that catalyzes the conversion of CO2 to bicarbonate ions (HCO3) and free protons (H+).  This enzyme is only attached on the surface of sour-sensing taste receptor cells, so when you eat Pop Rocks or drink carbonated soda, CO2 is broken down and H+ proton byproducts linger outside of the cell. Since sour-sensing taste receptors activate in response to acidic environments. Therefore, they will detect this abundance of free H+ protons and ultimately, detect the taste of carbonation [3].

(A) CO2 is broken down into HCO3- and H+ by the carbonic anhydrase 4 enzyme (B) The abundance of H+ byproducts creates an acidic environment. Through ion channels, the H+ ions enter the sour-taste receptor, which depolarizes the cell and leads to the detection of CO2 .

(A) CO2 is broken down into HCO3 and H+ by the carbonic anhydrase 4 enzyme
(B) The abundance of H+ byproducts creates an acidic environment. Through ion channels, the H+ ions enter the sour-taste receptor, which depolarizes the cell and leads to the detection of CO2 .

However, carbonation doesn’t always taste sour to us because CO2 is detected by multiple somatosensory systems in the body.  Some researchers even suggest that the tingling, burning sensations associated with the perception of carbonation can be caused by CO2 triggering pain receptors [4].

Would this mean our society’s desire for carbonated food and drink has strangely evolved against a natural aversion to experiencing pain?  Personally, I can’t hear over the loud buzzing noises of Pop Rocks in my mouth to find out…and as they say, “no pain, no gain”!

Note: Modified on September 19, 2014
The diagram illustrating taste detection of carbonation has been added in the current post.

References cited

  1. “Why do Pop Rocks pop?”   http://www.poprockscandy.com/history.html. Accessed 23 August 2014.
  2. Leon K, Mitchell W (1961) Gasified confection and method of making the same. US Patent No. US3012893 A.  Available: http://www.google.com/patents/US3012893. Accessed 20 August 2014.
  3. Chandrashekar J, Yarmolinsky D,  von Buchholtz L,  Oka Y, Sly W, et al. (2009) The Taste of Carbonation. Science 326: (5951) 443-445. doi:10.1126/science.1174601.
    Available: http://www.sciencemag.org/content/326/5951/443.full. Accessed 25 August 2014.
  4. Marziali C (2010) “Sparkling Drinks Spark Pain Circuits”. University of Southern California. http://dornsife.usc.edu/news/stories/796/sparkling-drinks-spark-pain-circuits/. Accessed 26 August 2014.
  5. “Champagne FAQ’s” http://www.champagnesabering.com/home.php?id=16. Accessed 16 September 2014.
  6. “How To Check Tire Pressure” http://www.dmv.org/how-to-guides/check-tire-pressure.php. Accessed 16 September 2014.

Eunice LiuAbout the author: Eunice Liu is studying Neuroscience and Linguistics at UCLA. She attributes her love of food science to an obsession with watching bread rise in the oven.

Read more by Eunice Liu


Fancy Chocolate Treats

Photo credit: Jesús Rodriguez (hezoos/Flickr)

Photo credit: Jesús Rodriguez (hezoos/Flickr)

Chocolate-covered strawberries have an innate beauty in their simplicity, making this snack both sweet and decadent. But this gourmet treat does not have to be expensive nor only savored at special events. Although it’s not quite as simple as dipping strawberries into soupy chocolate sauce, you can easily make chocolate-covered strawberries in your very own kitchen with a basket of strawberries, a bag of chocolate, and a little patience.

To perfect the crafting of chocolate-covered strawberries, it helps to first consider the composition of chocolate. Chocolate contains only a few ingredients: fat, sugars, proteins, and soy lecithin as emulsifier that holds everything together [1,2]. Cocoa butter, a fat that is derived from cocoa beans, makes up the majority of chocolate. Like many vegetable fats, cocoa butter is a mixture of fatty molecules called triacylglycerols. Different types of triacylglycerols—saturated, monounsaturated, polyunsaturated—have their own thermal and structural properties. Roughly 80% of cocoa butter are monounsaturated triacylglycerols [3]. The secret to chocolate perfection lies in the microscopic arrangement of these molecules. The texture (smooth vs. lumpy), appearance (glossy vs. dull), and melting temperature of chocolate (in your mouth at 98°F vs. in your hand at 82°F) all depend on how triacylglycerols pack together in the finished chocolate product.

Triacylglycerols are elongated, spindly molecules that can be packed together in different ways, sort of like long, skinny Legos. The three main ways that triacylglycerols can pack together are named α, β’, and β [3]. A pure mixture of triacylglycerols will form the most stable structure, β [4], and quality chocolate that is hard, smooth, and shiny will predominantly contain this β structure. Unfortunately, cocoa butter isn’t purely one type of triacylglycerol: while the 80% monounsaturated triacylglycerols will tend to pack together nicely into perfect β structures,  the other 20% of cocoa butter fat molecules can interfere and lead to less stable α or β′ structures. As shown in Table 1, chocolate can take on different combinations of α, β′, and β structures, categorized in order of increasing stability as crystals I-VI [2,3]. Crystal V possesses only the β structure, and so it boasts the most desirable chocolate characteristics, such as good sheen, satisfying snap, and melt-in-your-mouth smoothness.

Table 1. Properties of chocolate crystals (adapted from [2]).

Crystal Structure Melting Temp (°F) Chocolate Characteristics
I β′sub(α) 63 Dull, soft, crumbly, melts too easily
II α 70 Dull, soft, crumbly, melts too easily
III β′2 79 Dull, firm, poor snap, melts too easily
IV β′1 82 Dull, firm, poor snap, melts too easily
V β2 93 Glossy, firm, best snap, melts near body temp
VI β1 97 Hard, takes weeks to form

Unfortunately, getting chocolate to form the desired crystal type is easier said than done. When chocolate is melted and then left alone to re-harden on its own terms, uncontrolled crystallization occurs: any and all of the six crystal types will form at random. Chocolate that has been allowed to set this way ends up clumpy and chalky. To control crystallization and select for crystal V, the chocolate must be tempered. Through the tempering process, chocolate is first heated to 110-130°F to melt all the different crystal types. Most importantly, the temperature has to be higher than 82°F to melt the inferior crystals I-IV. Melted chocolate is then cooled down by adding “seeds” of chocolate that already contain only crystal V. These seeds are usually just pieces of chocolate that has already been tempered. Any piece of chocolate—chips, buttons, or chopped— can be used, as the majority of chocolate on the market has already been tempered. These seeds slowly cool the melted chocolate and act as a molecular template from which additional crystal V structures can grow [3]. As the chocolate cools, the stable crystal V will come together into a dense, even network, creating that lustrous, firm chocolate coating.

But beware: a drop of water can ruin all that hard work and perfectly tempered chocolate by causing it to seize. During the manufacturing process, water is removed from the chocolate, leaving behind a blend of fats and sugars. Introducing water to melted chocolate causes the sugar molecules to clump together in a process known as seizing [1]. These wet, sticky sugar clusters result in a grainy, thick batch of chocolate.

Seizing can happen when chocolate is melted in a double boiler, as water from the steam can get into the chocolate. It can also happen when pockets of chocolate are accidentally burnt. Burning is a chemical reaction that oxidizes the fats and sugars to produce carbon dioxide and water. Water that forms in the burnt pockets of chocolate will cause the rest of the batch to seize. But have no fear! Seized chocolate is not completely ruined: it can be saved by adding even more water or other liquids such as cream. Though it may seem counterintuitive, adding more water actually dissolves the sugar clumps, breaking them apart so that the chocolate can become smooth and creamy again [1]. Unfortunately, because there is now moisture in the chocolate, it will not dry and harden into a chocolate shell anymore. Chocolate rescued in this way can be used for hot chocolate, icings, fillings, or ganaches, which means you can still make an impressive chocolate treat even if the chocolate-covered strawberries don’t work out.


Chocolate-Covered Strawberries

1 lb. strawberries
16oz milk chocolate chips
Thermometer (optional, but would be helpful)

1. Melt half to two-thirds of the chocolate chips…

…In a double boiler: Stir constantly. Be sure steam doesn’t escape and sink into the chocolate. Do not cover.

…In the microwave: Heat on high 1 minute. Do not cover. Remove from the microwave and stir. If all the chocolate has not melted, heat again for 5-10 seconds. Repeat until completely melted
Note: If possible, avoid using a heat-retaining container like glass, which may burn the chocolate. Plastic is preferred.

2. Once completely melted, carefully continue heating until the temperature is 90-95°F.

3. Remove from heat, then add chocolate chips. Stir until the chips have melted and the chocolate is 82-88°F.

4. To test if the chocolate is ready, spread a thin layer on the back of a spoon or a piece of paper. It should harden in less than 3 minutes. If it doesn’t, stir in more chocolate chips.

5. When the chocolate is ready, carefully dip in strawberries. Make sure the strawberries are dry, before dipping. Allow dipped strawberries to dry on a sheet of parchment paper.


References Cited

  1. Corriher, S. Chocolate, Chocolate, Chocolate. American Chemical Society: The Elements of Chocolate. October 2007; <http://acselementsofchocolate.typepad.com/elements_of_chocolate/Chocolate.html>
  2. Loisel C, Keller G, Lecq G, Bourgaux C, Ollivon M. Phase Transitions and Polymorphism of Cocoa Butter. Journal of the American Oil Chemists’ Society. 1998;  75(4): 425-439.
  3. Rowat A, Hollar K, Stone H, Rosenberg D. The Science of Chocolate: Interactive Activities on Phase Transitions, Emulsification, and Nucleation.  Journal of Chemical Education. January 2011; 88(1): 29-33.
  4. Weiss J, Decker E, McClements J, Kristbergsson K, Helgason T, Awad T. Solid Lipid Nanoparticles as Delivery Systems for Bioactive Food Components. Food Biophysics. June 2008; 3(2): 146-154

Alice PhungAbout the author: Alice Phung once had her sights set on an English degree, but eventually switched over to chemistry and hasn’t looked back since.


Peppermint

Peppermints_LisaBunchofpants

Photo credit: Lisa Bunchofpants (bunchofpants/Flickr)

Seasonal winter treats somehow seem incomplete unless they are imbued with a frosty, peppermint flavor. This is easily accomplished by enhancing the recipe with peppermint oil or peppermint extract, cultivated from the leaves of the peppermint plant. This plant’s scientific name is Mentha x piperita, the “x” indicating that it is a hybrid mint, formed by crossing watermint (Mentha aquatica) and spearmint (Mentha spicata). As a hybrid plant, peppermint is sterile, unable to produce seeds. Instead, it reproduces via rhizomes, bulbous plant masses found underground that are very similar to ginger and turmeric roots. Like many rhizomes, peppermint rhizomes can be planted almost anywhere, growing quickly once sprouted. For this reason, the peppermint plant is listed as invasive in Australia, the Galapagos Islands, New Zealand, and the Great Lakes region of the U.S. [1].

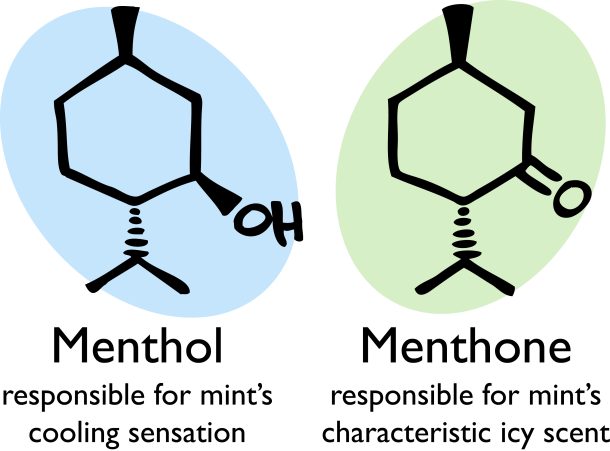
Peppermint oils and extracts get their characteristic Christmas-in-your-mouth flavor from their two main constituents, menthol and menthone. Of the two, menthol may be the more recognizable: When ingested, applied topically, or inhaled, menthol triggers cold-response sensory receptors, which cause that familiar cooling sensation [2]. You may have experienced this from chewing minty gums, using toothpaste, or applying Bengay to sore muscles.

PeppermintFlavors

Menthone is structurally related to menthol, but it affects a different sense in peppermint-flavored treats. This molecule gives rise to the icy, minty scent reminiscent of evergreen winters. Its distinctive fragrant property makes it popular in perfumes, cosmetics, and scented oils.

If you indulge in something peppermint this month, take some time to appreciate the menthol and menthone that makes this essence a holiday classic. Feel the sharp chill in your mouth while you bask in the warmth of a heated room. Take in the scent of cool mint while the winter wind outside whirls away. ‘Tis the season.

References Cited

  1. Pacific Island Ecosystems at Risk: Mentha x piperita <http://www.hear.org/pier/species/mentha_x_piperita.htm>.
  2. Knowlton, Wendy M., et al. “A Sensory-Labeled Line For Cold: TRPM8-Expressing Sensory Neurons Define The Cellular Basis For Cold, Cold Pain, And Cooling-Mediated Analgesia.” Journal Of Neuroscience 33.7 (2013): 2837-2848. Academic Search Complete. Web. 23 Nov. 2013.

Alice PhungAbout the author: Alice Phung once had her sights set on an English degree, but eventually switched over to chemistry and hasn’t looked back since.

Read more by Alice Phung