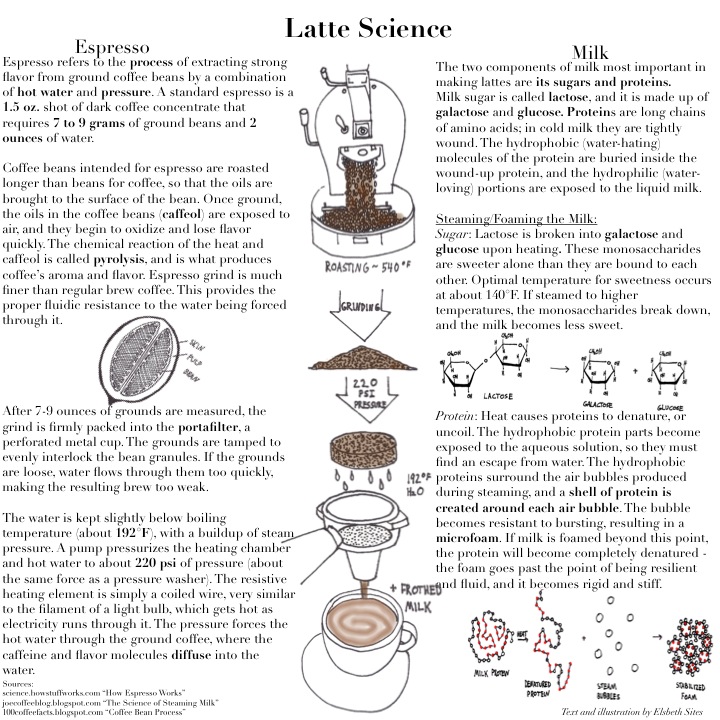
Latte Science
 About the author: Elsbeth Sites received her B.S. in Biology at UCLA. Her addiction to the Food Network has developed into a love of learning about the science behind food.

About the author: Elsbeth Sites received her B.S. in Biology at UCLA. Her addiction to the Food Network has developed into a love of learning about the science behind food.

Photo credits: flickr/Doug
Nothing sets the tone for a drowsy Sunday afternoon like a breakfast that features maple syrup. This sticky and wonderful syrup fills the nooks and crannies of our nation’s waffles with the taste of autumn and the smell of Canada. Let’s take a moment to appreciate the science that makes maple syrup and its confectionery relatives the crown jewel of breakfast condiments.
Generally, syrups are made by extracting sap from plants and boiling them down so they become a more concentrated and viscous liquid. The sugar maple tree, Acer saccharum produces the sap that can eventually become maple syrup, as it produces sap in greater quantities than other maple varieties.

Optimal conditions for sap harvesting involve extreme temperature fluctuations from day to night. The northeastern United States and eastern Canada, of course, have just the night-day temperature shifts to produce quality maple sap. The traditional sap-seeker drills a small hole into the cambium, or woody tissue, of a maple tree, and inserts a spout. On warm days when temperatures are above freezing, the liquid sap expands and creates positive pressure in the xylem – the plant version of veins; this pressure pushes sap out of the tap hole and into the collection vessel. When night falls and temperatures drop below freezing, sap contracts as all liquids do when chilled. As the sap contracts, this creates negative pressure, which sucks water from the soil into the roots and the tree; this replenishes the sap that has bled out of the tap hole.
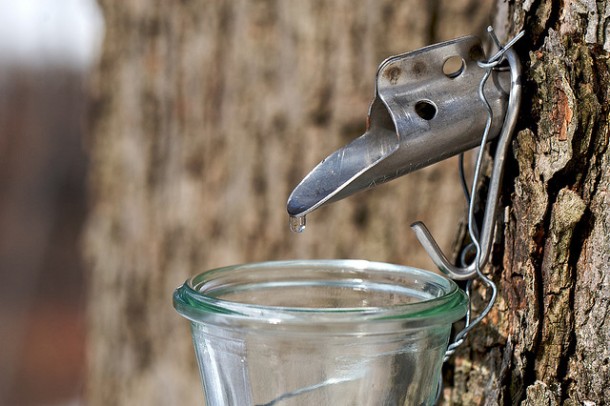
Photo Credits: flickr/Chiot’s Run
After harvesting, the harvested sap is boiled down until it has a viscosity of about 150-200 centipoises – a viscosity very similar to that of motor oil. When the liquid has reached this consistency, it has undergone a 40x reduction in volume. The resulting syrup is approximately 62% sucrose, 34% water, 3% glucose and fructose, and 0.5% malic acid, other acids, and traces amounts of amino acids. The distinct and lovely aromatic notes of maple come from wood byproducts like vanillin, other products of sucrose caramelization, and products of Maillard reactions between the plant sugars and the amino acids.

Photo Credits: flickr/LadyDragonflyCC
Another delectable treat from Northern climates is maple sugar. Maple sugar is made by boiling maple syrup (which has a boiling temperature 25-40°F above the boiling point of water, but varies with altitude) to increase sucrose concentration, then letting the syrup cool. Left alone, the sucrose accumulates into coarse crystals that are thinly coated with the remainder of the syrup. Simply put, maple sugar is plain table sugar with a natural coating of maple flavor.
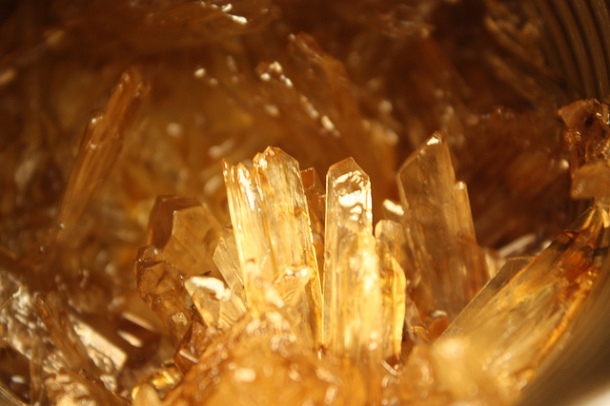
Photo Credits: flickr/cdn-pix
A luxury to smear on your toast or pancake, maple cream is surprisingly simple to make, and despite its name, doesn’t contain any dairy. This delicious creamy spread is a malleable mixture of very fine crystals that are dispersed in a small amount of syrup. Maple cream is made by cooling maple syrup rapidly to 70°F by immersing its container in ice water, then beating it continuously until it becomes very stiff; thereafter it is warmed until it becomes smooth and has the texture and viscosity of a runny buttercream frosting.

Photo credits: flickr/ Anne White
One last note on maple syrup – beware of imposters! If the bottle doesn’t say maple syrup, it is not maple syrup. Breakfast or pancake syrup disappointingly consists of corn syrup and artificial flavors.
Works Cited
About the author: Elsbeth Sites received her B.S. in Biology at UCLA. Her addiction to the Food Network has developed into a love of learning about the science behind food.
Gone are the days where all that was needed to make a cup of brewed coffee was an auto-drip machine and a paper filter. Coffee shops now have glass siphons lining the counter, looking as if they came straight from a chemistry lab. Baristas can be seen meticulously pouring water from a swan necked kettle into a ceramic funnel, which slowly drips coffee into a cup sitting on a scale. There is even a ready-to-serve cold brew option that was prepared the night before. These days, coffee shops seem to be stocked with new tools for brewing the delicious caffeinated beverage. With the resulting brews varying in flavor, why stick to just one method? Each apparatus has a different extraction process and requirements for grind coarseness, heat, and time.

A cup of coffee. Photo Credit: (Julius Schorzman/Wikimedia Commons)
For all brewing methods, coffee must first be ground; then its soluble components must be dissolved in water, so they are released into the resulting brew. It is suggested to grind coffee right before brewing, since the process releases flavor as well as results in a higher perceptions of aromas; these aromas consist of highly volatile compounds which can evaporate into the air over time [1]. The grind level and particle size also play important roles in the taste of the final cup of coffee. If the grind is too fine, bitter coffee can result from over-extraction of chlorogenic acids; if the grind is too coarse, a weaker brew may result from the decreased surface area [2].
Coffee brewing is generally classified under three types: decoction, infusion or steeping, and pressure methods.
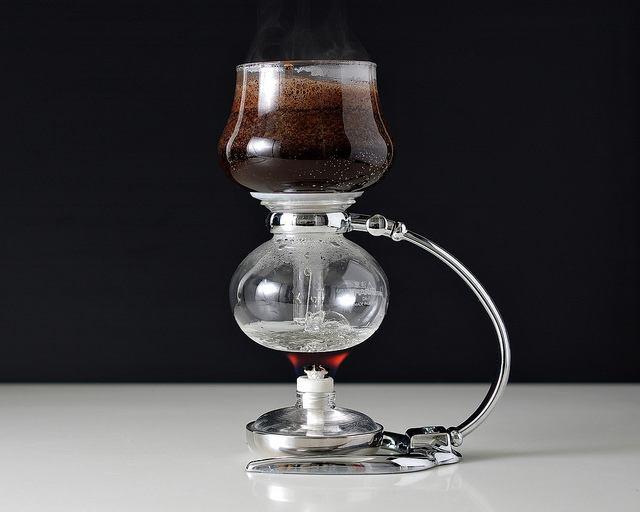
Decoction: Siphon
In decoction, ground coffee is in contact with high temperature water for a period of time, causing a more intense extraction [2]. Siphon, or vacuum brewed coffee, is an example of this method. Since many variables can be controlled, the coffee can be evenly extracted over a period of 45 seconds to 1 minute [3].

Siphon. Photo Credit: Janne Moren (JanneM/Flickr)
A siphon consists of two glass chambers arranged vertically. Near boiling water is added to the bottom chamber with a heat source underneath. When the water is heated past its boiling point (212 °F or 100 °C), the heat source transfers energy to the water and produces vapor, or steam. Eventually, the pressure created from the gas exceeds that of the atmospheric pressure in the siphon. In order to create more room for itself in the bottom chamber, the gas forces the remaining liquid into the upper chamber. The coffee grounds are added at this point and stirred. The heat source maintains a constant pressure, keeping the brew in the upper chamber. Once the brew is complete, the heat source is removed and the water vapor condenses back into liquid form. Since liquid takes up less volume than gas in the bottom chamber, a negative pressure void is created that is then equalized by the brew flowing down [4].
Infusion/Steeping: Chemex
An infusion involves steeping coffee in water before filtration, and creates a milder brew with more acidity [2]. An example is the Chemex, which is a funnel shaped apparatus with a pour over filter cone attached to a decanter. This is similar to a typical auto-drip coffeemaker where the coffee is steeped and dripped through a paper filter. However, the Chemex has some advantages, including control over water temperature, infusion time, and pouring technique. The filter used is also thicker, so the grounds are able to steep in the water and drip out more slowly. More flavor compounds are released, resulting in a clean tasting brew with “bright” and “high” notes [5].

Chemex. Amy Roth (minimallyinvasivenj/Flickr)
To prepare coffee with the Chemex, a medium to medium-coarse grind is placed on top of a pre-rinsed filter. Hot water is poured from a swan neck kettle (the narrow spout maximizes pour control) in a circular motion. As the first pour touches the coffee grounds, it degasses and carbon dioxide (CO2) is released, resulting in bubbles and puffed up grounds. This is called a “bloom,” and this process influences the flavor and aromas of the brew, including increased acidity if the bloom time proceeds for too long [6]. The reasoning behind this is that when CO2 reacts with water, it produces carbonic acid. Interestingly, lighter roasted coffee beans retain more CO2 than darker roasts [7].
CO2 (aq) + H2O (aq) « H2CO3 (aq)
Once the gas is released, the water starts to dissolve the solubles in the coffee grind, which are responsible for many of the flavor components. As the brew starts to drip into the decanter, additional water is poured in the same circular motion to make sure that the grounds are constantly replenished with fresh water [6]. The grounds must always be immersed to maintain a constant temperature for the brew and to keep the chemical reactions going. This method also creates a strong osmotic pressure to extract the coffee concentrate from the grounds: since there are more coffee solutes in the grind and less in the watery environment, the solutes will want to escape through the semi-permeable cell membranes of the coffee beans. However, since water is continuously poured over the surface of the grounds, there is a possibility of over extraction from the top layer [7].
Pressure: Moka pot
Unlike decoction and infusion, this method involves water being forced through grounds with high pressure and heat, similar to the style of espresso [2]. The Moka pot consists of a bottom chamber with water, a metal filter filled with ground coffee, and a screw-on upper chamber.

Moka pot during extraction process. Photo Credit: (RyAwesome/Flickr)
Similar to the siphon, a heat source causes the water in the bottom chamber to form steam. However, instead of mixing the water with coffee for steeping, the water vapor pushes the water through the coffee grounds and the brew emerges out of the top portion as a gurgling sound is made. The bottom chamber is not filled all the way with water to ensure an air gap for pressure to form. In fact, in case the pressure in the bottom chamber gets too high, there is a safety valve on the lower chamber that lets the air out to keep the apparatus from exploding.
With all of these different options, brewing coffee is now more of an art form than just a way to obtain caffeine. Whether you use a Moka pot at home or have a barista prepare a cup using a pour over method, you can be sure that each resulting brew will be far from tasting the same.
References cited
 About the author: Catherine Hu is pursuing her B.S. in Psychobiology at UCLA. When she is not writing about food science, she enjoys exploring the city and can often be found enduring long wait times to try new mouthwatering dishes.
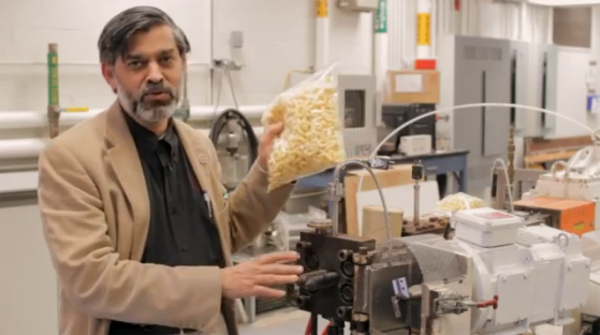

Rutgers Professors Rick Ludescher and Mukund Karwe explain the basic chemical principles of emulsions and introduce food engineering techniques like extrusion and high-pressure processing. If you’ll be on the East Coast this fall, be sure to check out Rutgers’ crash courses in food science and food safety. Read more
In our unit on pressure, we used plants as a model system. What makes lettuce crispy? How do you revive wilted lettuce? It’s really all about pressure- turgor pressure, to be exact.

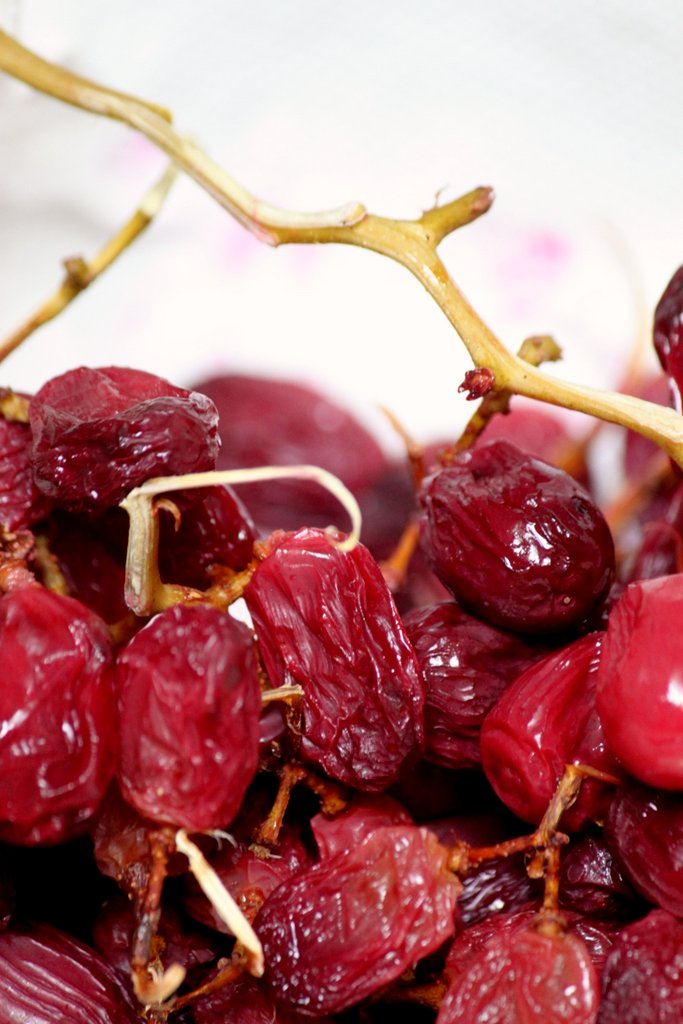
We prepared tasting samples of dehydrated grapes (aka raisins) and kale chips to demonstrate the vital role that water and pressure play in plants. Under normal conditions, grapes are juicy and firm, and kale is hardy and stiff. We placed both in a dehydrator, which works as a low-temperature oven (~130 °F/54 °C). Water evaporates, and the cells lose turgor pressure and shrink. The grape becomes soft and mushy on the inside, and the kale, which is normally so tough and sturdy, shatters like a chip.
And for reviving that wilted lettuce? Soak it in cold water, of course.
RECIPES
Dehydrated Grapes

Grapes
Boiling water
Dehydrator
1) Wash grapes well.
2) Bring a pot of water to a boil. Blanch* grapes in boiling water for 30-60 s.
3) Pat grapes dry.
4) Places grapes on dehydrator racks. Turn on dehydrator. If it has a temperature setting, some recipes suggest 140 °F. Our dehydrator has only one temperature setting of ~130 °F, so we just went by touch. A wrinkled grape with a still-moist center takes 3-4 hours.
*Blanching dissolves the waxy cuticle on the surface of grapes. The wax is a natural defense mechanism against water evaporation.
Kale Chips

Kale
Olive oil
Salt
Pepper
Paprika, cumin, other seasonings
1) Rinse and dry kale leaves. Cut lengthwise in half, and again in thirds.
2) Toss kale with olive oil in bowl. Sprinkle with salt, pepper, and other seasons.
3) Arrange leaves in single layer on dehydrator racks. Turn dehydrator on. Let run for ~2 hours.
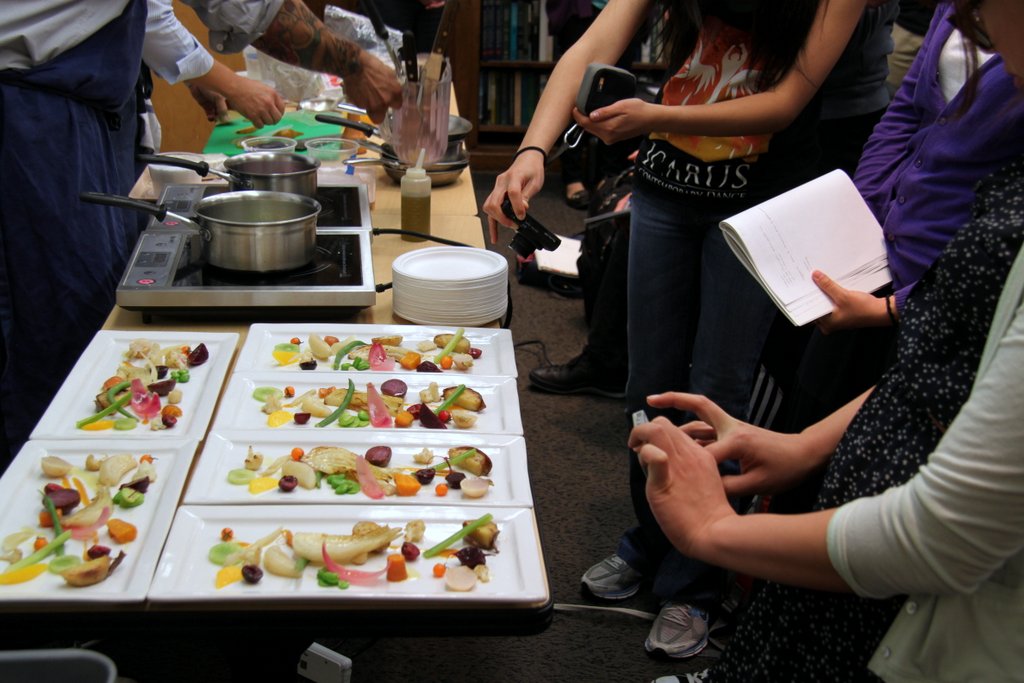
This week’s lecturer is Gary Menes. He is the chef at Le Comptoir, a pop-up restaurant at Tiara Café in LA.
Gary Menes and sous-chef Wesley Avila weighed in on our topic of the week, “Pressure,” with their version of the veggie platter. There were 20-odd vegetables and fruits present, including pickled onions, the season’s first cherries, pickled orange segments, Okinawan sweet potato, and quickly sautéed fava beans.

Gary packed cherries in a bag and used a cryovac machine to suck out all the air in the bag. The resultant vacuum compresses and bruises the cherries, changing their texture and flavor in the process.

Want to make quick-pickled onion petals? Slice the onion in quarters or halves and peel apart the layers to get petals. Heat up a quick-pickling solution of 3 parts water : 2 parts red wine vinegar : 1 part sugar. Once hot, submerge the petals and let rest for 30 minutes.
