Tag Archive for: science

Chia Seed Apple Pie

Continuing our Science of Pie adventure, we’ve invited Elsbeth Sites of Team Chia to share her pie science project, which examines the use of a very unconventional thickener to tune the viscosity of pie filling.  Elsbeth is an undergraduate student of physiological sciences at UCLA who is passionate about food and writing, especially writing about food.

Have you ever baked a lovely pie, sliced it and placed it gently on your best dessert plates, then watched in despair as the filling fled its warm crust and bled all over the dish? This common and unfortunate experience led our team to investigate the viscosity of pie filling. We hoped to discover a way to produce a pie of perfect viscosity that upon slicing, would not spread over the plate too far, nor be too gelatinous. Most pies contain cornstarch to thicken their fillings. To make our project unique and to put a modern and healthy twist on our pie, we replaced starch with the trendy new superfood: chia seeds.

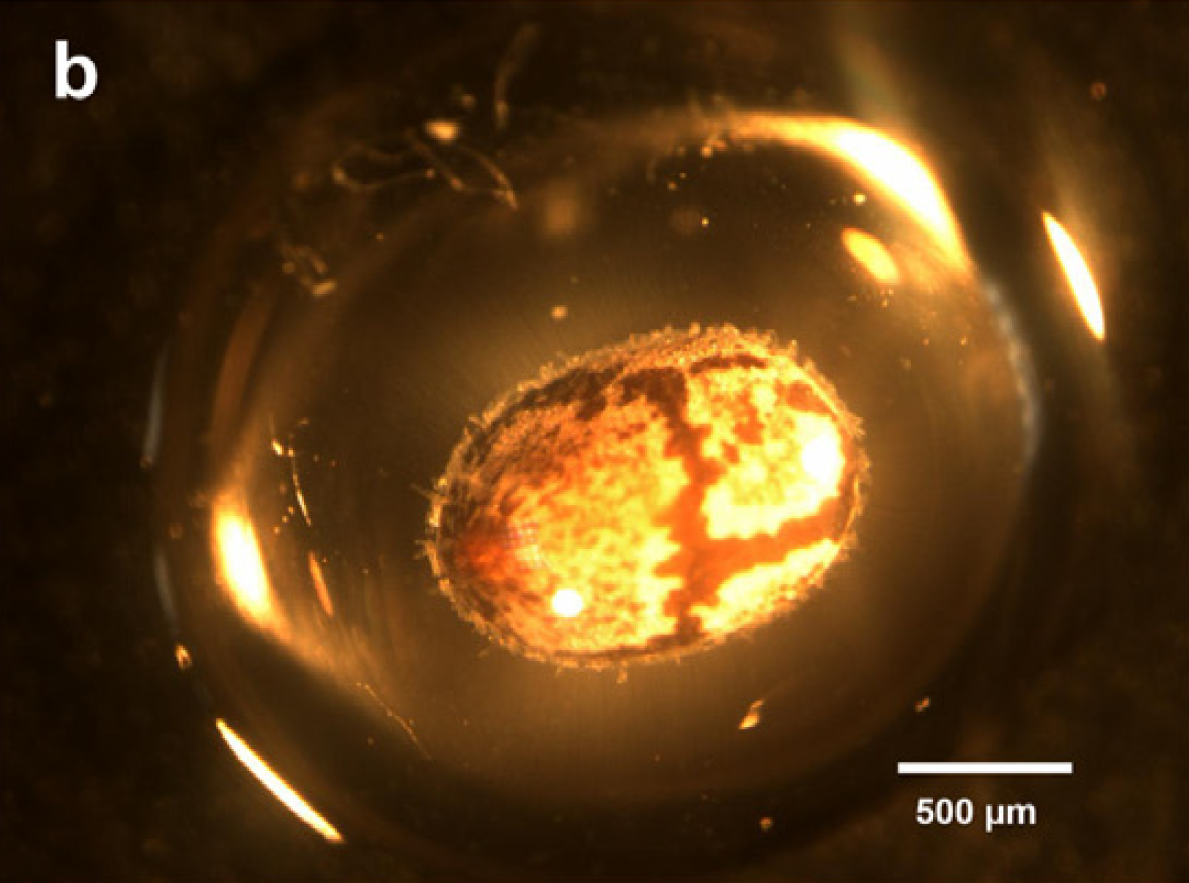
The outside of the chia seed contains large fibrous molecules called polysaccharides. When the seed is wet, these molecules are exuded from the seed and trap liquid. This allows the seed to hold approximately nine times its own weight in water, causing a bead of gel to form around the seed [1].

Chia seed hydration. Chia seeds can absorb approximately nine times their weight in water. Water absorption creates a mucilaginous gel around the seed. Figures are from [1].

With this knowledge of the chia seed, we posed these questions:

  • How do we create a pie that does not bleed across a plate when sliced while not being overly gelatinous?
  • Can chia seeds be used to increase the viscosity of our pie filling?
  • At what concentration should the seeds be added to the pie to get an ideal viscosity without compromising taste or texture?
Measuring viscosity with the “line spread” test. The line spread test measures the distance a liquid or semiliquid flows across a flat surface. We used a hard, clear, plastic surface marked with concentric circles spread 0.5 cm apart across a 7.5 cm radius. Lines originating in the circles’ center divide the circles into four quadrants. The longest distance traveled by the filling in each quadrant was averaged to find the mean distance that the filling spread.

We defined our perfect filling to be one that spread slightly when placed on a flat surface without remaining too gelatinous and not spreading at all. A traditional apple pie filling prepared with cornstarch spread 5.6 centimeters in 60 seconds. Finding the right concentration of seeds to add was a tedious process, and the heat at which the pie was baked and served greatly affected the pie’s viscosity. As shown in the figure above, our control filling with no thickening agent spread on average 5.9 centimeters in 60 seconds—clearly too runny. The filling to which we added 0.5 teaspoons of chia seeds spread 5.5 centimeters. By evaluating these spread distances and tasting each filling, we agreed that the filling with only 0.5 teaspoons seeds yielded the best viscosity and palatability. Using more seeds than this overpowered the spices in the filling, making the pie taste nutty and giving it a slimy mouthfeel.

Our experiment was successful in that we answered our original questions:

  • Chia seeds can indeed be used to tune the viscosity of apple pie filling.
  • To produce an apple pie of optimal viscosity, replace cornstarch with 0.5 tsp chia seeds per ½ cup of filling. While our pie might appeal to the culinarily curious or health savvy, those who prefer a classic pie may find the seeds of the pie annoying, or might miss the texture that more traditional thickeners like cornstarch or flour provide the filling.

If a seedy apple pie up your alley, here is Team Chia’s recipe for Chia Seed Apple Pie. The truly adventurous might even try using chia seeds in a berry pie where thickening agents are more crucial and tiny seeds are less noticeable. If you do try another variation of a chia seed pie at home, let us know how it goes in the comments below!


Pie Crust
Adapted from Everyday Food: Our Best Pie Crust

2 1/2 cups all-purpose flour, plus more for rolling dough
1 tsp salt
1 tsp sugar
16 tbsp (2 sticks) cold unsalted butter, cut into pieces
4 tbsp ice water, plus 2 more if needed

In a food processor, pulse flour, salt, and sugar several times to combine. Add butter. Pulse until mixture resembles coarse meal, with just a few pea-size pieces remaining.

Sprinkle with 4 tablespoons ice water. Pulse until dough is crumbly but holds together when squeezed with fingers (if needed, add up to 2 tablespoons more ice water, 1 tablespoon at a time). Do not over-process.

Turn dough out onto a work surface; form dough into two 3/4-inch-thick disks. Wrap both separately and tightly in plastic, and refrigerate until firm, at least 1 hour.


Pie Filling and Assembly

5 Granny Smith apples, sliced
3/4 cup granulated sugar
2 1/2 tsp chia seeds
1/2 tsp ground cinnamon
1/8 tsp ground nutmeg
1/2 cup cold water
3/4 cup apple juice

Preheat oven to 350 degrees.

Wash, peel, and core apples. Cut apples into 1/4- to 1/2-inch slices and place in cold water.

Combine sugar, chia seeds, and spices in a large pot with water and apple juice. Stir and cook on medium high heat until mixture thickens and begins to bubble. Boil for 1 minute, stirring constantly. Fold in apple slices immediately and remove from heat.

To assemble pie, roll dough into 2 14-insh rounds. Fit the first crust into the bottom of a 9-inch pie plate. Spoon filling into the pie dish. Cover the pie with the second crust, trimming the overhang to about 1 inch. Press upper and lower crust edges together and flute as desired. Cut steam slits in the center of the top crust.

Bake for 20 minutes at 350 degrees or until crust is golden brown.


References Cited

  1. Muñoz LA, Cobos A, Diaz O, Aguilera JM (2012) Chia seeds: Microstructure, mucilage extraction and hydration. J Food Eng 108: 216–224. doi:10.1016/j.jfoodeng.2011.06.037.

10 More Things You Should Know About Pie

It’s summer. Berries and stone fruits abound, and so the season of pies continues. And we continue to think deeply about the science of pie. There has been intense interest in pies these past few months: first at the Science of Pie event; next at the World Science Festival’s Scientific Kitchen workshop at Pie Corps in New York; and most recently the New York Times Pie Issue. But we believe you can never know too much about pie. Here are 10 more things we think you should know…

WSFPieScience1

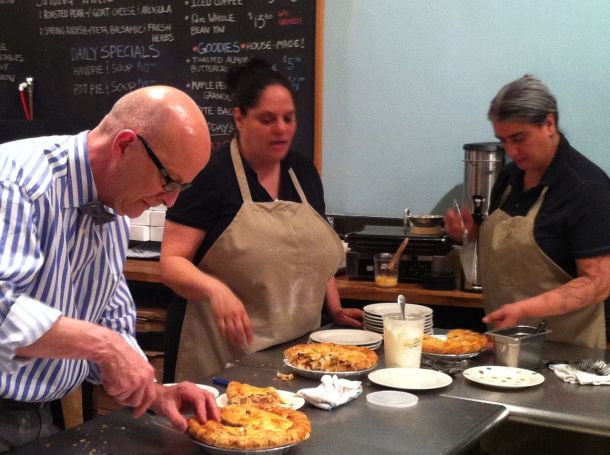
The World Science Festival’s Science of Pie workshop featured Amy Rowat with Pie Corps’ Cheryl and Felipa and special guest Bill Yosses, White House Pastry Chef and mastermind behind some of the best pies that Barack Obama has ever tasted. Here Cheryl, Felipa, and Bill dish out apple pie for the workshop participants.

WSFPieScience2

Science of Pie workshop participants deeply engaged in the science (and eating!) of pie.

1. A bit of high school chemistry goes a long way when baking pies.
The ideal gas law (PV=nRT) tells us that the volume of an air pocket gets bigger with increasing temperature. In the oven, molecules get more energy and start moving faster and faster, causing air pockets to get bigger and bigger; this can result in an inflated pie that collapses once you cut into it. At the same time, apples lose water, most of which gets converted to steam. Consider that a water molecule takes up about 1700 times more volume in the gas phase than in the liquid phase: if your crust were completely impermeable to water and all the steam got trapped inside, your pie would become much larger than your oven! Luckily much of that steam can escape through the crust and through steam vents. (This is also a good reason to be sure to avoid air pockets when you lay your crust into your pie tin!)

2. There is an art to cutting your fruit for a pie filling.
The way you cut your fruit is important. Smaller pieces of fruit will cook more quickly, but they also tend to lose more liquid since they have a higher surface-area-to-volume ratio. The geometry of your fruit pieces is also important for packing the filling into your pie. After placing your fruit slices into the center of the pie, pat them down to make sure they all like flat. This will create a pie with a lovely cross-section of layered fruits and, more importantly, will help to avoid air pockets that can expand in the oven.

3. Sometimes the best pie is a day-old pie.
Temperature is important for pie texture. Eating your pie the day after you bake it allows plenty of time for the pie to cool down and the filling to “set”. Because molecules flow more quickly past each other at higher temperatures, hot pie filling straight from the oven will be more runny; as the pie filling cools, starchy molecules like cornstarch and flour spend more time interacting with each other. As the pie cools, the pectin molecules of your fruit also spend more time interacting with each other. This results in a more solid, gel-like filling that will take longer to seep out of the pie when it is cut and served on a plate.

4. Think of butter as a gas.
Butter is really just a bunch of teeny tiny water droplets dispersed in a matrix of fat. In the oven, these water droplets convert from liquid to gas. This means that the chunks of butter you can see in your dough are really just big pockets of air waiting to happen. More air = flakier crust! While butters with the highest butterfat content are generally synonymous with the highest quality butter, when it comes to baking pie a slightly lower fat content, and higher water content, may be a good thing.

5. Wash with egg for a darker, more delicious pie crust.
All those lovely color and flavor molecules in a nicely browned pie crust are the result of the Maillard reaction, a chemical reaction that occurs between amino acids, which comprise proteins, and sugar molecules like lactose or glucose. Brushing an egg (protein) on your pie crust before baking is a great way to add extra color and flavor. For extra browning, mix some heavy cream into your egg wash (more protein plus lots of lactose).

WSFPieScience3

Look at all those Maillard reactions!

6. Turn up the heat!
Maillard reactions happen faster at higher temperatures. Keep your oven hot (375F or so) to brown your pie that extra bit more. Another strategy is to start off at 400F, then turn down the temperature to 350F.

7. Bake your pie in parts.
A major challenge in baking pie comes from its complexity: you’ve got a crust that should be brown and crisp together with a filling that largely contains water. When contending with fruit pie fillings, one strategy is to prebake the bottom crust to help prevent it from becoming soggy. In this process of “blind baking,” don’t forget to prick holes in the bottom of your crust so the water vapor can escape. Filling your pie crust with pie weights or dried beans during this process can also help prevent layers of your wanton bottom crust from puffing up. Pie master Bill Yosses suggests taking this sequential baking process an extra step further: after the bottom crust has baked, it can be stitched into the sides of a crust using extra dough to “glue” the bottom to the sides. In the spirit of experimentation, this could be an interesting new method to try.

8. Create a pie crust with your “perfect” texture.
Typical attributes of a “perfect” pie crust include: flaky, tender, brown, and a little crispy. While the optimal texture of a pie crust is a deeply subjective and personal matter, here is a rough guide to how you can tune your pie crust texture simply by considering how you work your fat into your flour. For taste, color, and texture, we prefer butter, but shortening or lard can also be used.

  1. You want your fat to be solid when working it into the flour. Remember those little chunks of fat will become pockets of air in your crust! In a liquid form, it would coat the flour too evenly, resulting in a less flaky crust.
  2. Because butter melts around 30–32 degrees Celsius (86–90F), it can be tricky to make sure it remains solid while you work it with your hands (about 35 degrees Celsius or 95F). Prior to making your dough, cut your butter into small 1 x 1 cm cubes and place in the freezer for about 10-15 minutes.
  3. For a crust that has more form and larger flaky holes, work your very cold butter into the flour until you have a distribution of butter pieces with various sizes: some should appear the size of peas, others the size of almonds. When you work your butter in to achieve these sizes of chunks, much of the butter will get worked in so the rest of the dough will appear as coarse wet sand.
  4. For a tender and flaky crust you need a decent coating of fat around your flour. To achieve this, try the two-step method: (i) Divide your butter in half: cut one half into small cubes, and keep the remaining half in stick form. Place both halves in the freezer to ensure they are very cold. (ii) Work the stick of very cold butter into your flour by grating it in with a coarse grater. Work in thoroughly with your hands until the mixture has the texture of a coarse sand. (iii) Add the remaining half of your butter in cubes and work in with your hands until the largest pieces are about the size of peas. The theory here is that completely coating the flour in oil helps create a more “tender” crust.
  5. If you want to avoid getting your hands messy, or want to minimize heating of your butter, use a pastry cutter, or two knives held side by side, to work the butter into your flour.

9. Different types of flour create different types of pie crust.
What flour is the best flour for pie crust? This is a contentious question that has a variety of answers depending on personal preference, but the type of flour you use can have a major effect on the final texture of your crust. The protein content of flour, based on the type of wheat the flour was made from, will affect the extent of gluten formation in your dough. While springy networks of gluten proteins are great for chewy breads (bread flour has particularly high protein content), they can make pie crust dense and tough. Flours with lower protein content, such as pastry flour or cake flour, will create less extensive gluten networks and can produce a more tender crust. However, the pie crust ultimately needs to be formed into a dough, which can make it a challenge to work with a fragile dough that can result when using a low-protein content flour.

10. Almond extract tastes great in a fruit pie.
What more can we say? Nuts and fruit taste great together! A bit of almond extract is a delicious complement to apples and apricots alike.

AppleFoodPairing

And it’s not just almonds—lots of fruits and nuts go great with apples. This food pairing map from www.foodpairing.com is full of interesting flavor combinations.


Amy RowatAbout the author: Amy Rowat is a professor at UCLA. She began experimenting with food as a toddler and continues to research soft biological matter in the lab and kitchen.

Read more by Amy Rowat


The Science of Pie: 2013 Event Recap

On Sunday we held our third and final 2013 Science and Food public lecture: The Science of Pie. Renowned pastry chef Christina Tosi joined us all the way from New York to explain her process for creating new desserts, and Los Angeles native and super-star baker Zoe Nathan shared her tips for baking the perfect apple pie. Guests indulged in delicious goodies from Zoe Nathan’s Huckleberry Café, Compost Cookies from Momofuku Milk Bar, and espresso brewed by four talented baristas.

IMG_0232

Zoe Nathan and Christina Tosi answer questions from the audience after their lectures.

And, of course, there was pie.

For weeks, students from the UCLA Science and Food course have been studying the apple pie and using scientific inquiry and experimentation to try to create the “ultimate” apple pie experience. Students examined everything from how different apple varieties behave in pie filling to how the size and shape of the pie affects baking. Several students also played with unconventional ingredients, including avocado oil, yogurt, chia seeds, and whiskey.

ScienceOfPieCooking

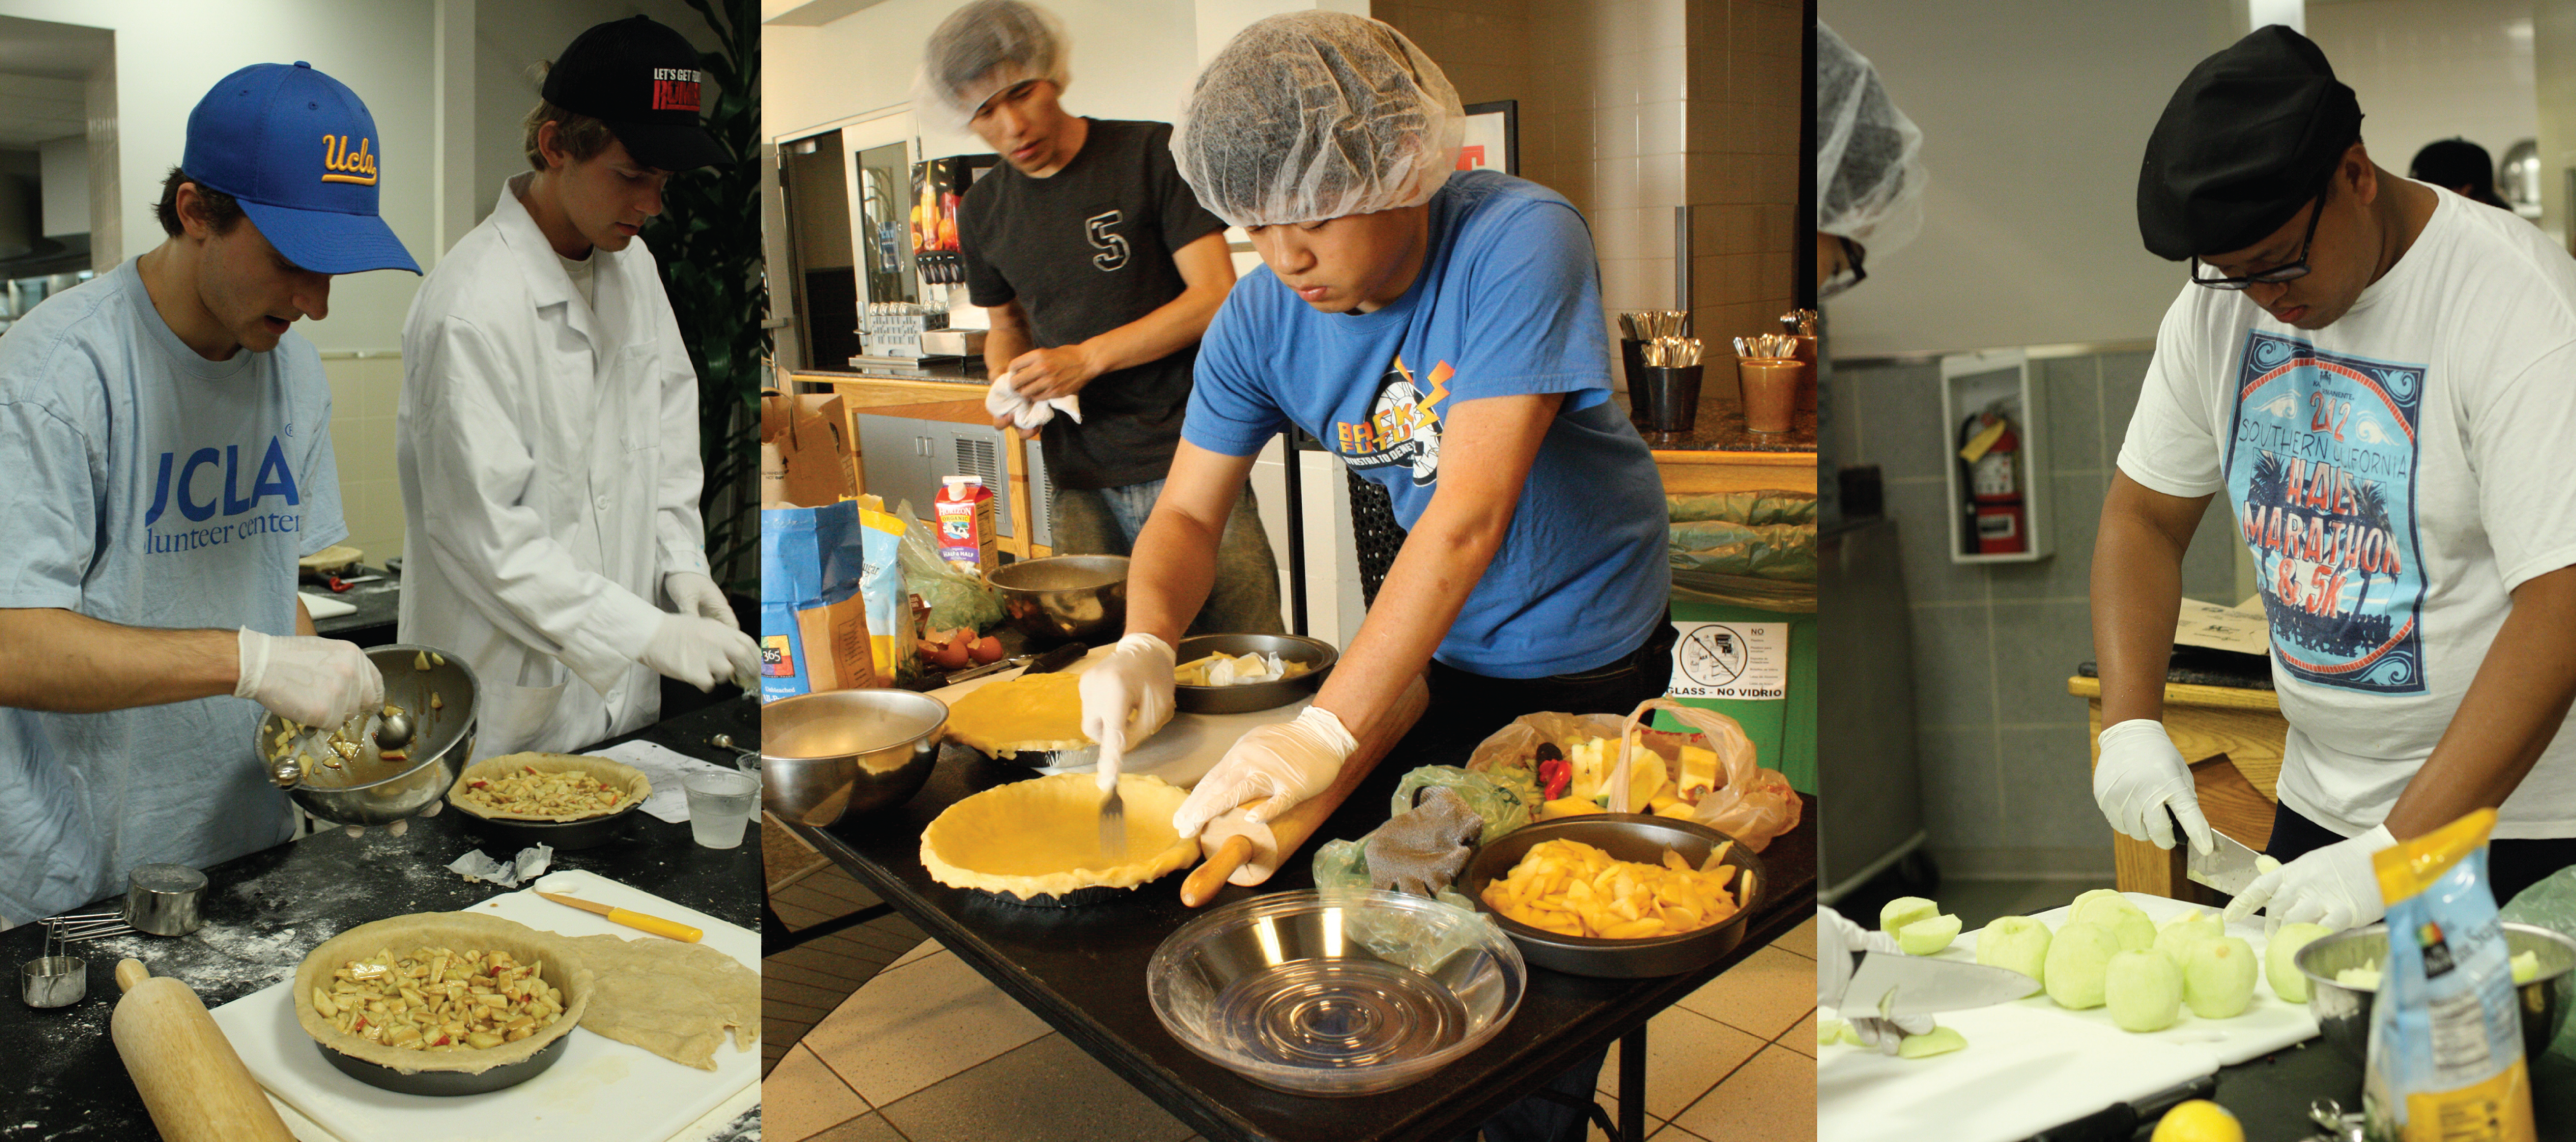
Students prepare their apple pies the morning of the event.

IMG_3444

Students share their research projects and apple pies with the public.

The students presented their research projects and pies at Sunday’s event. While the public enjoyed sampling the scientific treats, the pies were scrutinized by an esteemed panel of judges made up of chefs (Christina Tosi and Zoe Nathan), food critics (Evan Kleiman and Jonathan Gold), and scientists (UCLA Professors Andrea Kasko and Sally Krasne). After tasting the pies a talking with the students, the public voted for their favorite pie and the judges settled on three additional stand-outs. The lucky winners all took home wonderful prizes from our friends at Breville.

Best Overall Pie
Alia Welsh (Team Sablé)
Apple pie with shortbread crust and streusel topping.
This solo effort explored the vast parameter space of pie, studying the effect of fat content and temperature on the texture of the shortbread crust, as well as the effect of pH on the browning of the streusel topping. The final winning pie had shortbread made with room temperature standard American butter.

Best Tasting Pie
Stephan Phan, Kevin Yang, Amirari Diego (Team Apples to Apples)
Deconstructed apple pie with pie crust crumbs and spherified apples.
Using the technique of spherification, this team applied their knowledge of diffusion and gelation to prepare “reconstituted” apples. They found that optimizing both the calcium chloride concentration and gelation time was key to making a delicious modernist apple pie.

Judge’s Favorite Pie
Qiaoyi Wu, Qinqin Chen, Michelle Cheng (Team Aπ3)
Pie crust made with different liquids, including vodka, beer, and sparkling water.
Seeking to perfect pie crust texture, team Aπ3 experimented with different liquids that may impede the formation of gluten protein networks. Gluten gives structure and stability to pie dough, but can also make pie dough dense and tough when over-developed. The team examined the porousness, density, and browning of pie crusts prepared with three different liquids compared to water and concluded that vodka creates the flakiest pie crust.

People’s Choice Award
Elan Kramer, Caleb Turner (Team “Insert Team Name Here”)
Frozen apple pie with peanut butter mousse.
This student duo thought outside the box with this creative apple and peanut butter pie. To create the ultimate peanut butter experience, the team experimented with the effect of egg white content on the texture and density of the peanut butter mousse.

The Science of Pie was the perfect end to a fantastic lecture series. We are so grateful to our amazing lecturers and all the people and sponsors who made the lectures possible. And although the 2014 lectures might seem impossibly far away, don’t worry—the Science & Food blog is not going anywhere! Keep an eye on out for more exciting food science posts, profiles, recipes, and maybe even a few videos through the rest of the year.


Liz Roth-JohnsonAbout the author: Liz Roth-Johnson is a Ph.D. candidate in Molecular Biology at UCLA. If she’s not in the lab, you can usually find her experimenting in the kitchen.

Read more by Liz Roth-Johnson


Get Ready for Science & Food 2013!

Update: This contest is now closed.

Congratulations to our winner, Lysandra Sayer, who  took home a Juice Fountain Crush from our friends at Breville. Check out her winning tweet: Read more

MIT Chocolatiers & The Nanotech in Our Food

MIT-LCSscreenshot

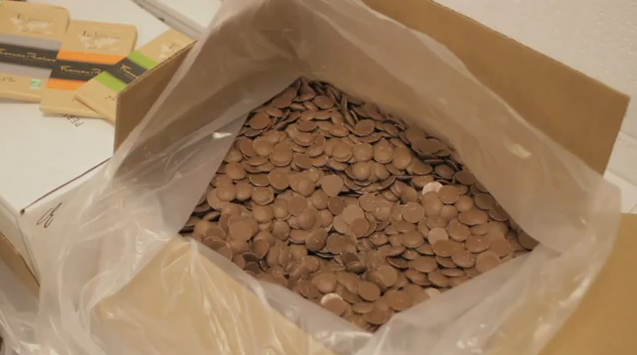
MIT students perfect their truffle-making skills, while the New York Times examines the use of nanomaterials in common food products. Read more

Does your cheese taste of microbes?

In our unit on microbes and exponential growth, we learned about the role of microbes in altering flavor and mouthfeel.  One of our favorite microbial foods is cheese:  Cheese would just be spoiled milk if it were not for microbes.

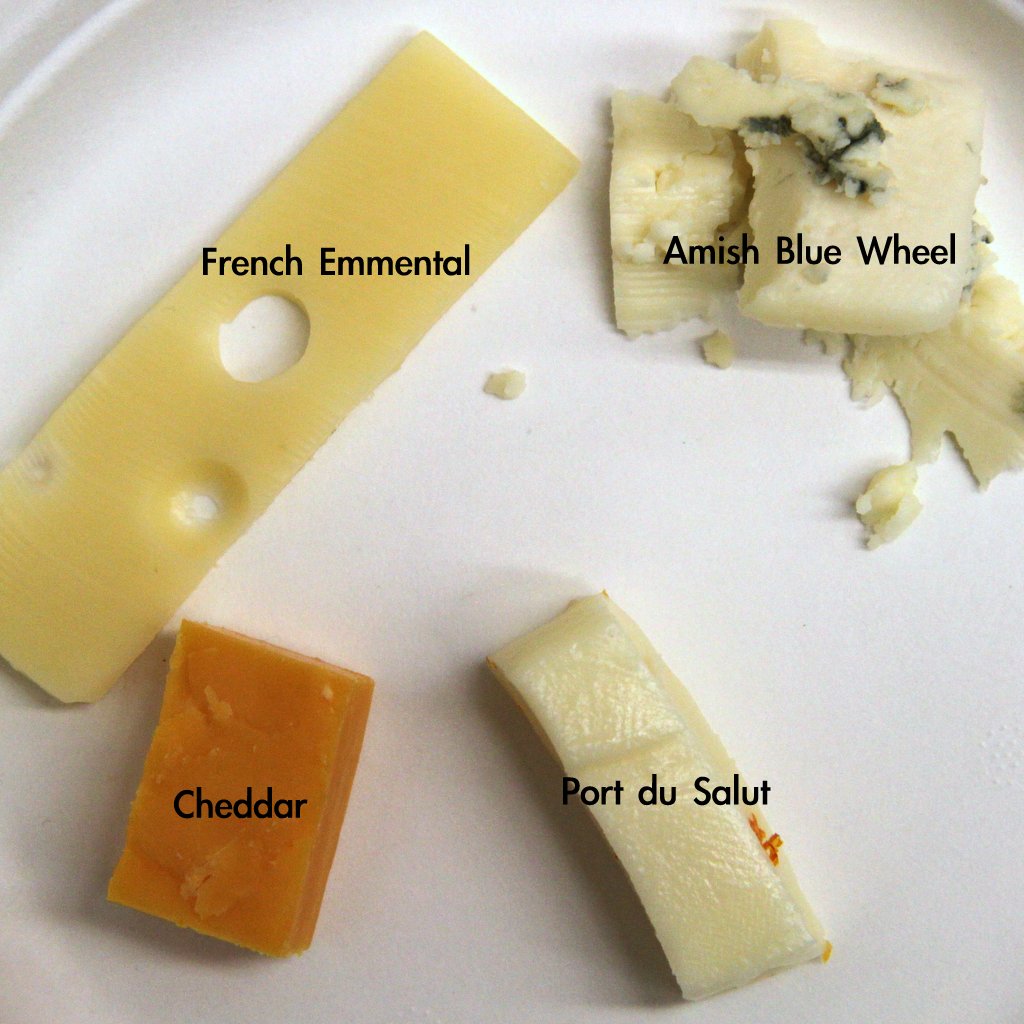
To kick off the class, we challenged the students with a taste test featuring four distinct cheeses:

A) Amish Blue Wheel
B) Emmental
C) Cheddar
D) Port du Salut

We also presented four different types of microbes, and a bit about natural habitats.    Can you guess which microbe belongs to which cheese? Answers below.

1) Propionibacterium (inhabit human skin)
2) Penicillium mold (grow in cool, moderate climate; some species have blue color)
3) Brevibacterium (grow especially well without much personal hygeine)
4) Lactococcus lactis (grow well in acidic conditions)


ANSWERS:

A. 2 – Blue cheeses are inoculated with a strain of Penicillium mold, Penicillium roqueforti. Needles or skewers are used during the inoculation, which is why blue cheeses often have distinct veins running through them.

B. 1 – Emmental is a type of Swiss cheese, which is known for its holes. These holes are bubbles excavated by carbon dioxide, a byproduct of lipid breakdown by Propionibacterium freudenreichii, subsp shermanii. Its close cousin, Propionibacterium acnes, is linked to acne.

C. 4 – Cheddar is an example of a wide variety of cheese types that rely on Lactococcus lactis for the first stage of ripening. L. lactis uses enzymes to produce energy from lactose, a sugar molecule common in dairy products. Lactic acid is the byproduct.

D. 3 – Port du Salut is a washed-rind cheese. The cheese surface is wiped or washed down with a brine that promotes the growth of certain bacteria in the air. A smear of bacteria can be directly applied to the surface to nudge along the process. Brevibacteria linens is commonly used during this inoculation. Ever get a whiff of stinky feet from your cheese? Brevibacteria linens is the culprit, in the cheese and on real smelly feet.

Plants under pressure

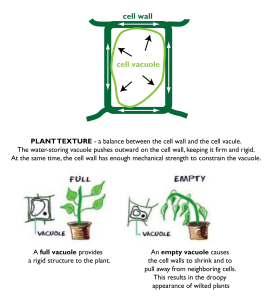
In our unit on pressure, we used plants as a model system. What makes lettuce crispy? How do you revive wilted lettuce? It’s really all about pressure- turgor pressure, to be exact.

TurgorPressure

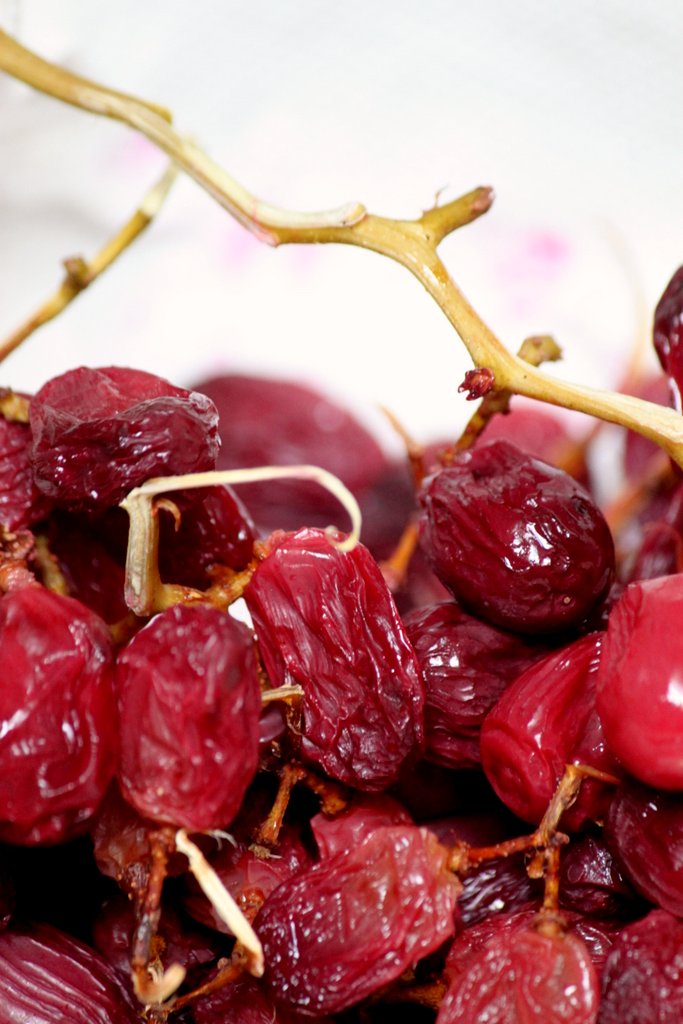
We prepared tasting samples of dehydrated grapes (aka raisins) and kale chips to demonstrate the vital role that water and pressure play in plants. Under normal conditions, grapes are juicy and firm, and kale is hardy and stiff. We placed both in a dehydrator, which works as a low-temperature oven (~130 °F/54 °C). Water evaporates, and the cells lose turgor pressure and shrink. The grape becomes soft and mushy on the inside, and the kale, which is normally so tough and sturdy, shatters like a chip.

And for reviving that wilted lettuce? Soak it in cold water, of course.


RECIPES

Dehydrated Grapes

Grapes
Boiling water
Dehydrator

1) Wash grapes well.
2) Bring a pot of water to a boil. Blanch* grapes in boiling water for 30-60 s.
3) Pat grapes dry.
4) Places grapes on dehydrator racks. Turn on dehydrator. If it has a temperature setting, some recipes suggest 140 °F. Our dehydrator has only one temperature setting of ~130 °F, so we just went by touch. A wrinkled grape with a still-moist center takes 3-4 hours.

*Blanching dissolves the waxy cuticle on the surface of grapes. The wax is a natural defense mechanism against water evaporation.

Kale Chips

Kale
Olive oil
Salt
Pepper
Paprika, cumin, other seasonings

1) Rinse and dry kale leaves. Cut lengthwise in half, and again in thirds.
2) Toss kale with olive oil in bowl. Sprinkle with salt, pepper, and other seasons.
3) Arrange leaves in single layer on dehydrator racks. Turn dehydrator on. Let run for ~2 hours.